General

AI
Model
Choose which AI model powers your agent. Totebot supports models from OpenAI (GPT-5 family and GPT-4o), Anthropic (Claude Opus, Sonnet, and Haiku), Google (Gemini 2.0, 2.5, and 3), Mistral, and xAI (Grok). The picker shows every model currently available on your plan. As a rule of thumb:- Larger models (e.g. Claude Opus, GPT-5) give the highest answer quality for complex or nuanced conversations.
- Balanced models (e.g. Claude Sonnet, Gemini Flash) offer a strong mix of quality, speed, and cost, a good default for most stores.
- Smaller, faster models (e.g. Claude Haiku, GPT-5 Mini/Nano) are the cheapest and fastest, ideal for high-volume, straightforward support.
Creativity (temperature)
Temperature controls how creative or deterministic your agent’s replies are, on a scale from 0 to 2:- Lower (around 0 to 0.3): focused, consistent, predictable answers. Best for customer support and factual responses.
- Higher (around 0.7 to 1): more varied, creative phrasing. Useful for marketing-style or conversational tones.
Instructions
Make sure to write a specific description that will help your agent provide better answers and deliver more value to your business. We recommend including details such as:- Role: define what the agent should act as (e.g., “AI shopping agent” or “customer support agent”).
- Standards: set the tone, style, and level of detail you expect in replies (e.g., “friendly and concise” or “professional and thorough”).
- Values: reflect your brand’s principles (e.g., “always helpful,” “honest about product availability,” “focused on customer satisfaction”).

Language
Totebot supports 95+ languages. Here you can specify the primary language your agent will use for its responses. Setting a primary language ensures your agent replies consistently and matches your customers’ expectations. If needed, you can later add additional languages or switch to another supported language, depending on your audience. Totebot can also reply in more than one language, automatically adapting to the language your customers speak during the conversation.Skills
The AI tab also hosts your agent’s skills: reusable instructions that tell the agent how to behave in specific situations. See Agent Skills for details.Chat Interface
The Chat Interface section lets you fully customize how your agent looks and behaves on your website. This is where you adapt Totebot to reflect your brand. You can control both the visual design and the conversation settings to make sure the agent feels natural and aligned with your business.General Settings
- Agent name and profile image: Give your agent a name and add a profile image or logo. This helps personalize the interaction and ensures it reflects your brand identity. For example, a beauty store might name the agent “Beauty Agent” with a logo of a lipstick, while a tech shop might use their company logo.
- Colors and design: Customize the chat bubble color and text color. As you adjust them, you’ll see a live preview on the right-hand side. This makes it easy to experiment until you find the right look. A key tip: make sure your text is highly visible against the background to avoid readability issues.
- Chat bubble placement: Decide whether the bubble should appear on the left or right side of the screen, depending on your site’s design and user habits.
-
When the chat bubble appears: You can control when the chat bubble shows up to visitors. For example, you might want it to appear immediately, or after a short delay so it’s not too pushy. Think about your audience; sometimes a delayed appearance feels more natural and less intrusive.
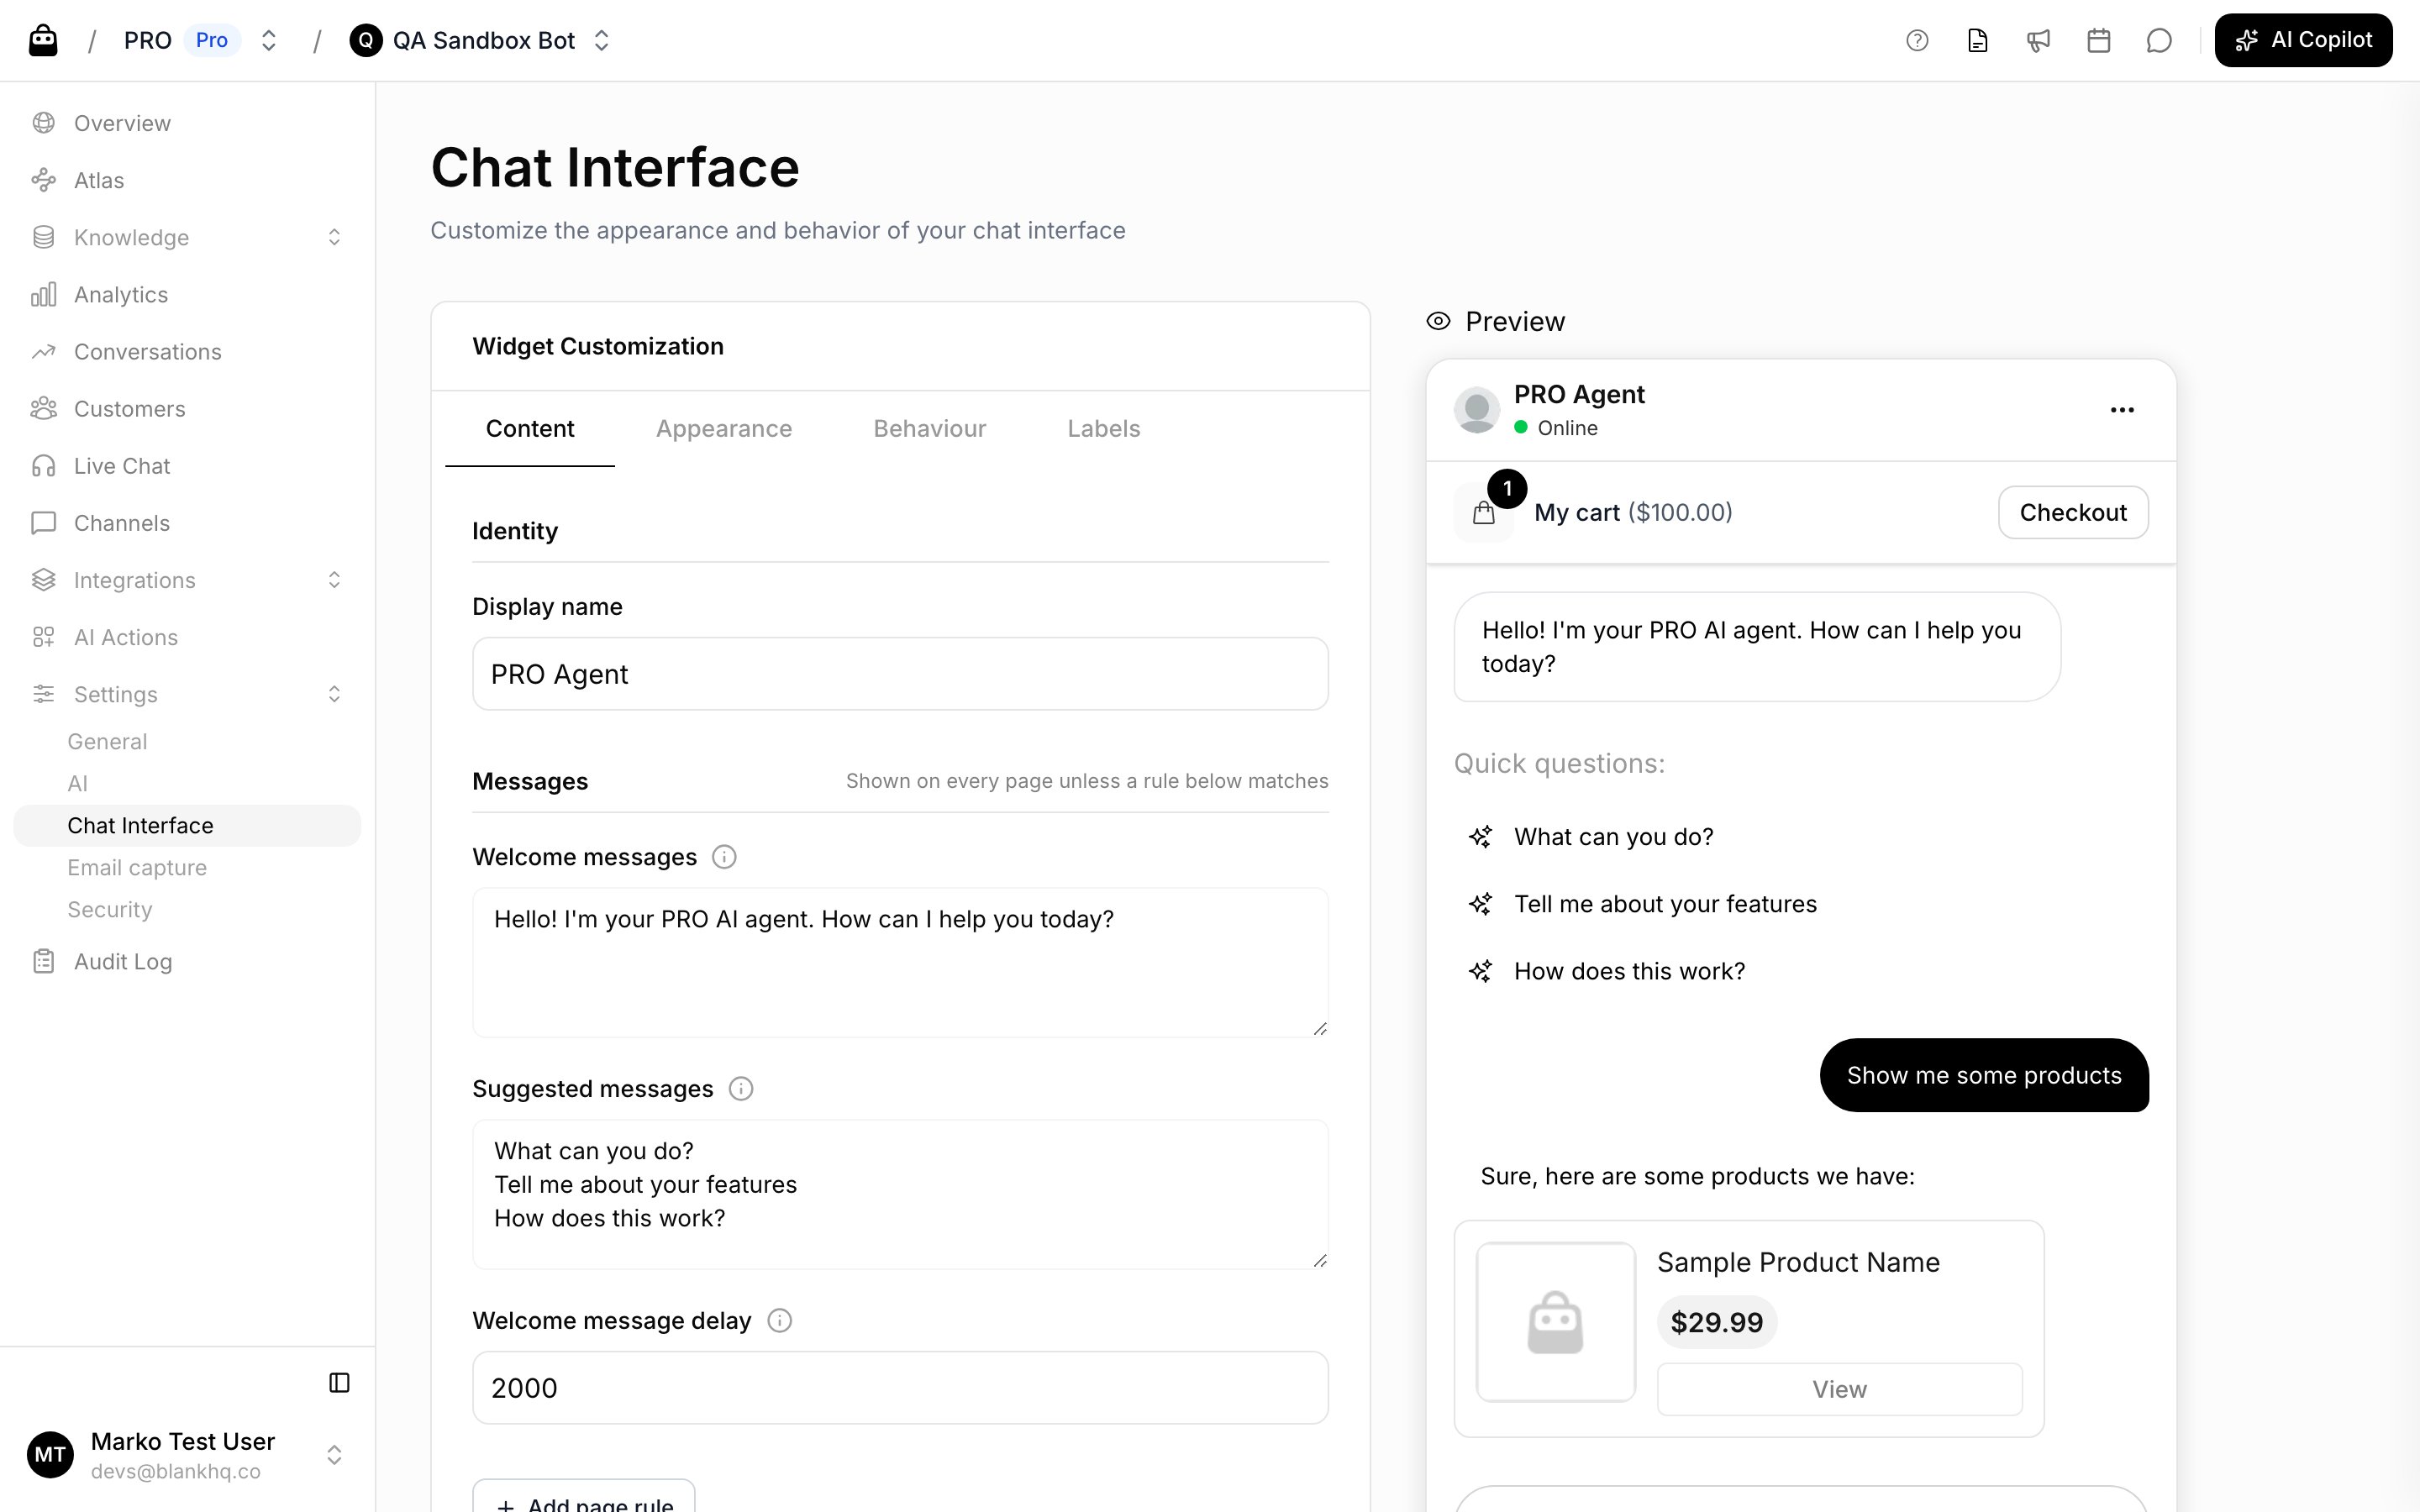
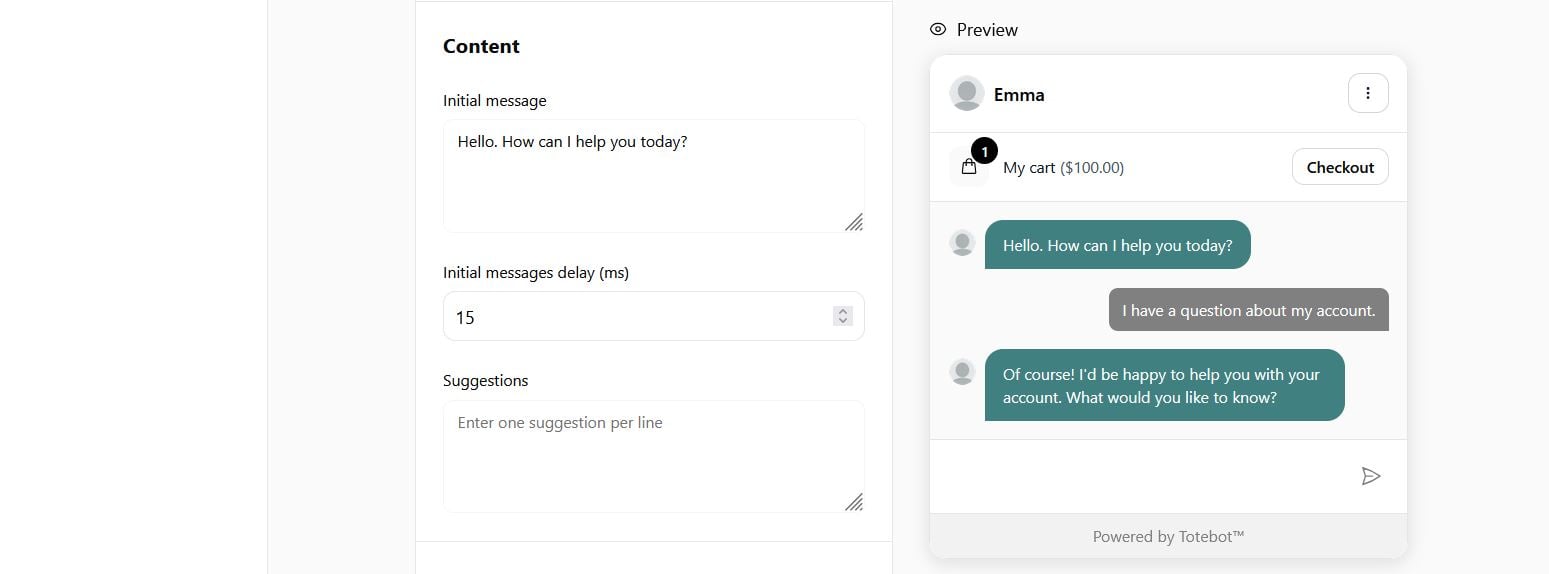
Content Settings
- Welcome message: Craft a greeting that matches your brand voice. This could be as simple as “Hello, how can I help you today?” or something more creative like “Hi there! Looking for the perfect snowboard? I’ve got you covered.”
- Message timing: Choose how soon the welcome message appears after a visitor lands on your site. Often it’s better to add a short delay so the message feels contextual rather than immediate.
- Suggestions: In the settings, you can add “suggestions”, pre-set options that appear to guide users in starting a conversation (for example: “Browse products”, “Check shipping policy”, “Talk to support”). These can help reduce friction by showing visitors what kind of questions they can ask.
Labels
The Labels section (within Chat Interface) allows you to customize the text shown in different parts of your chatbot interface. These small adjustments are important because they help the agent feel on-brand, natural, and easy to use for your customers.- Input box placeholder: This is the text that appears in the input field before a customer types anything (e.g., “Type your question here…”). A clear placeholder encourages users to start interacting.
- Suggested messages heading: Shown above the suggestion buttons, this text sets context for quick-start options (e.g., “Popular questions” or “Quick links”).
- New Chat Button Label: The text on the button customers use to start a new conversation. Make it clear and friendly (e.g., “Start a new chat”).
- View Chats Label: The label customers see when they want to return to past conversations. Keep it simple, like “View conversations”.
- No Conversations Label: Displayed when there are no past chats. For example, “No conversations yet”.
- No Conversations Description: This text gives extra context when the chat history is empty. Example: “Once you start chatting, your conversations will appear here.”
- Start New Conversation Button Label: Another button for beginning a fresh interaction. Could be labeled as “Start chatting” or “Ask a question”.
- Messages View Title: The title displayed at the top of the chat window. Often set as “Chat with us” or “Customer Support”.
- My Cart Label: Shown when the agent displays the shopping cart (e.g., “My Cart” or “Your Basket”).
- Empty Cart Label: Text displayed when the cart is empty, e.g., “Your cart is currently empty.”
- Checkout Button Label: The label on the button that moves the customer to checkout, e.g., “Proceed to Checkout”.
- View Product Button Label: The button label when displaying product details. Example: “View Product” or “See Details”.
- View in Store Button Label: Opens the product page in your store. Keep it action-driven, e.g., “View in Store”.
- Add to Cart Button Label: The text for adding items to the shopping cart. Example: “Add to Cart” or “Add Item”.
- Quantity Label: Shown when adjusting product quantities, e.g., “Quantity”.
Security
The Security section allows you to control who can access your Totebot agent and how often they can interact with it. These settings help you balance accessibility with protection against abuse or spam.Access control and rate limiting
Public access By default, your agent is publicly accessible. Toggle this off if you want to limit it to specific environments. Request limit per visitor The maximum number of messages a visitor can send within the time window. Time window (seconds) How long, in seconds, before the limit resets. Limit reached message What visitors see when they reach the message limit. Keep it informative and on-brand, for example: “Rate limit exceeded. Please try again later.”Public API key
The Security tab is also where you generate and revoke your agent’s Public API key. See the Public API guide for usage.
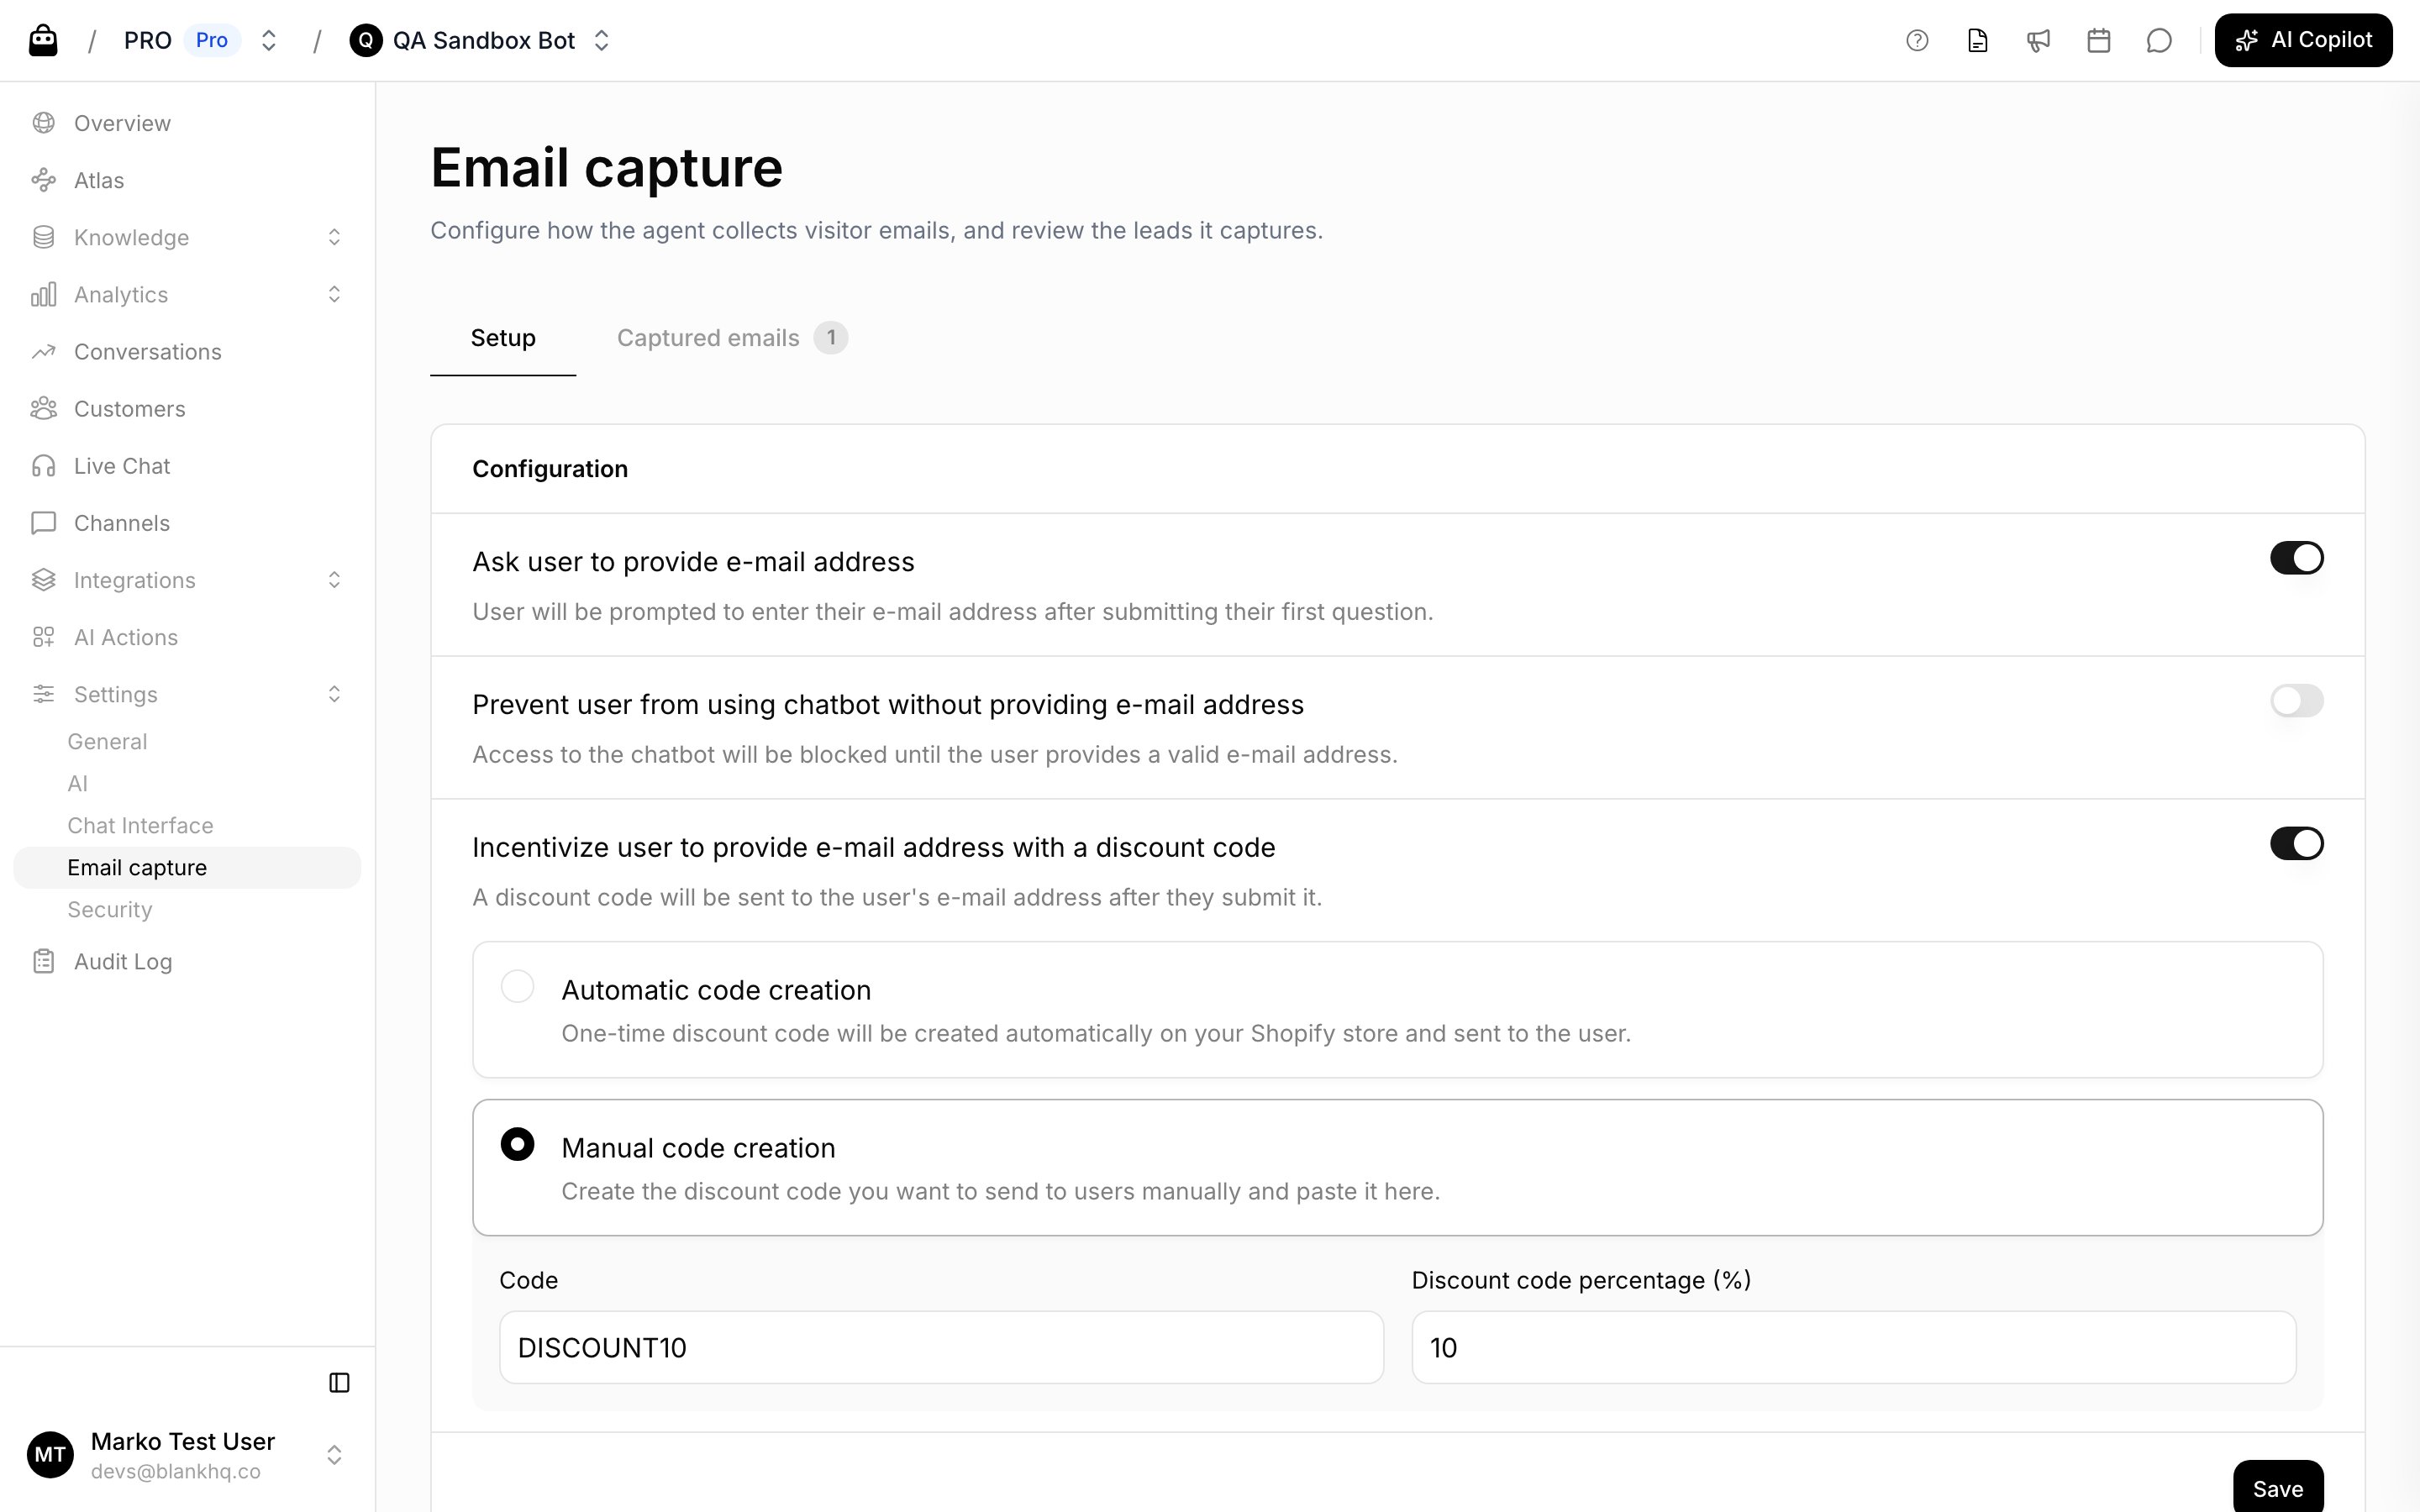
Email capture
This feature lets you collect customer email addresses directly within the chat. It’s useful for capturing leads, following up on inquiries, and reconnecting with customers outside the conversation. The Email capture page has two tabs: Setup for configuring the prompt, and Captured emails for reviewing the addresses you’ve collected.Setup
- Ask user to provide e-mail address: when enabled, the agent prompts the visitor for an email after their first question.
- Prevent user from using chatbot without providing e-mail address: blocks access to the agent until the visitor enters a valid email. Leave this off to let visitors skip.
- Incentivize user to provide e-mail address with a discount code: sends a discount code to the visitor’s email after they submit it. You can choose:
- Automatic code creation: a one-time discount code is created on your Shopify store and sent to the user.
- Manual code creation: enter a code and discount percentage yourself, and the agent sends it.
Captured emails
Collected addresses appear under the Captured emails tab, and can also be accessed via the Public API.