- Lead
- API Call
- Web Search
- Custom Button
- Click the Add Action button.
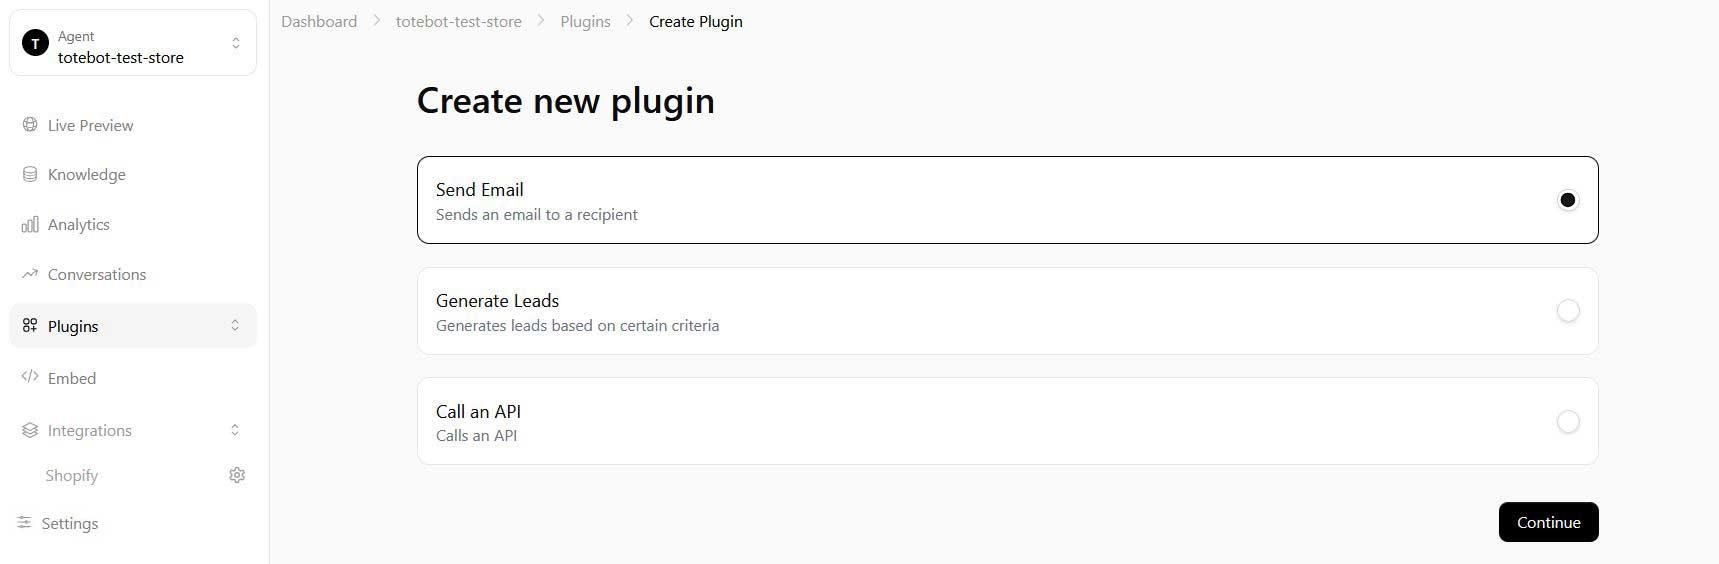
- Choose the Email option and click Continue.
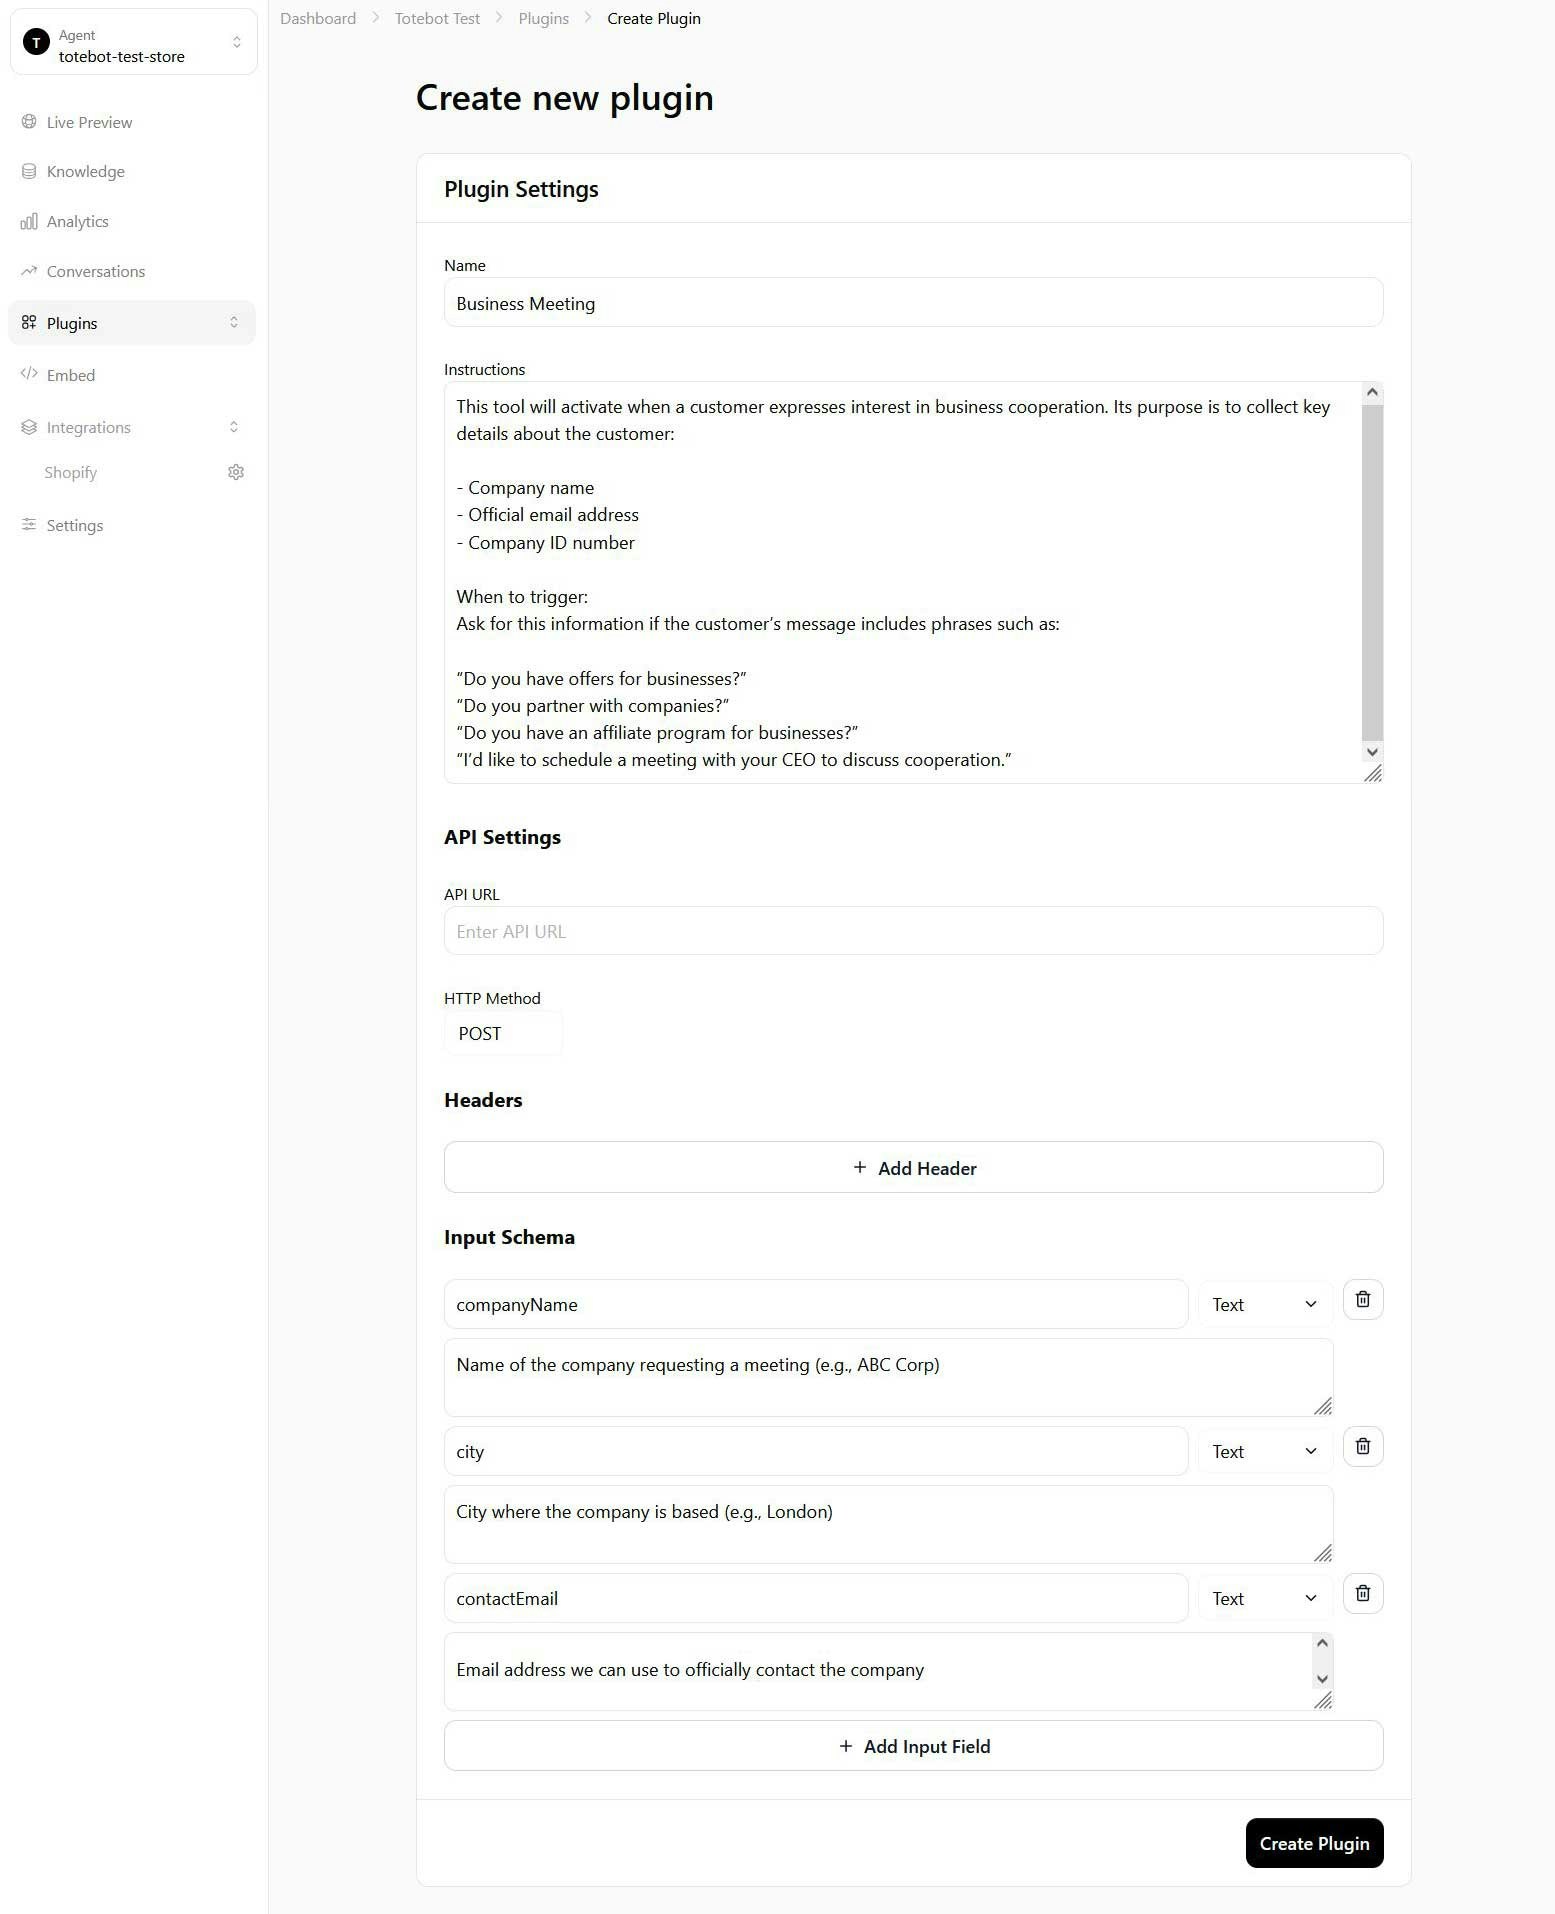
- Fill in each field based on your use case.

- Action name: Choose a clear and recognizable name. This is especially useful if you plan to create multiple email actions.
- Instructions for the agent: Include details such as when should the agent send an email, what trigger phrases or questions from users activate this action, what should the agent reply or ask in response. Make sure the agent collects a valid email address (and name) from the user and instructs the agent to send the email.
- Body content (based on collected user info)
- Recipient email address (where collected data will be sent)
- Email subject line
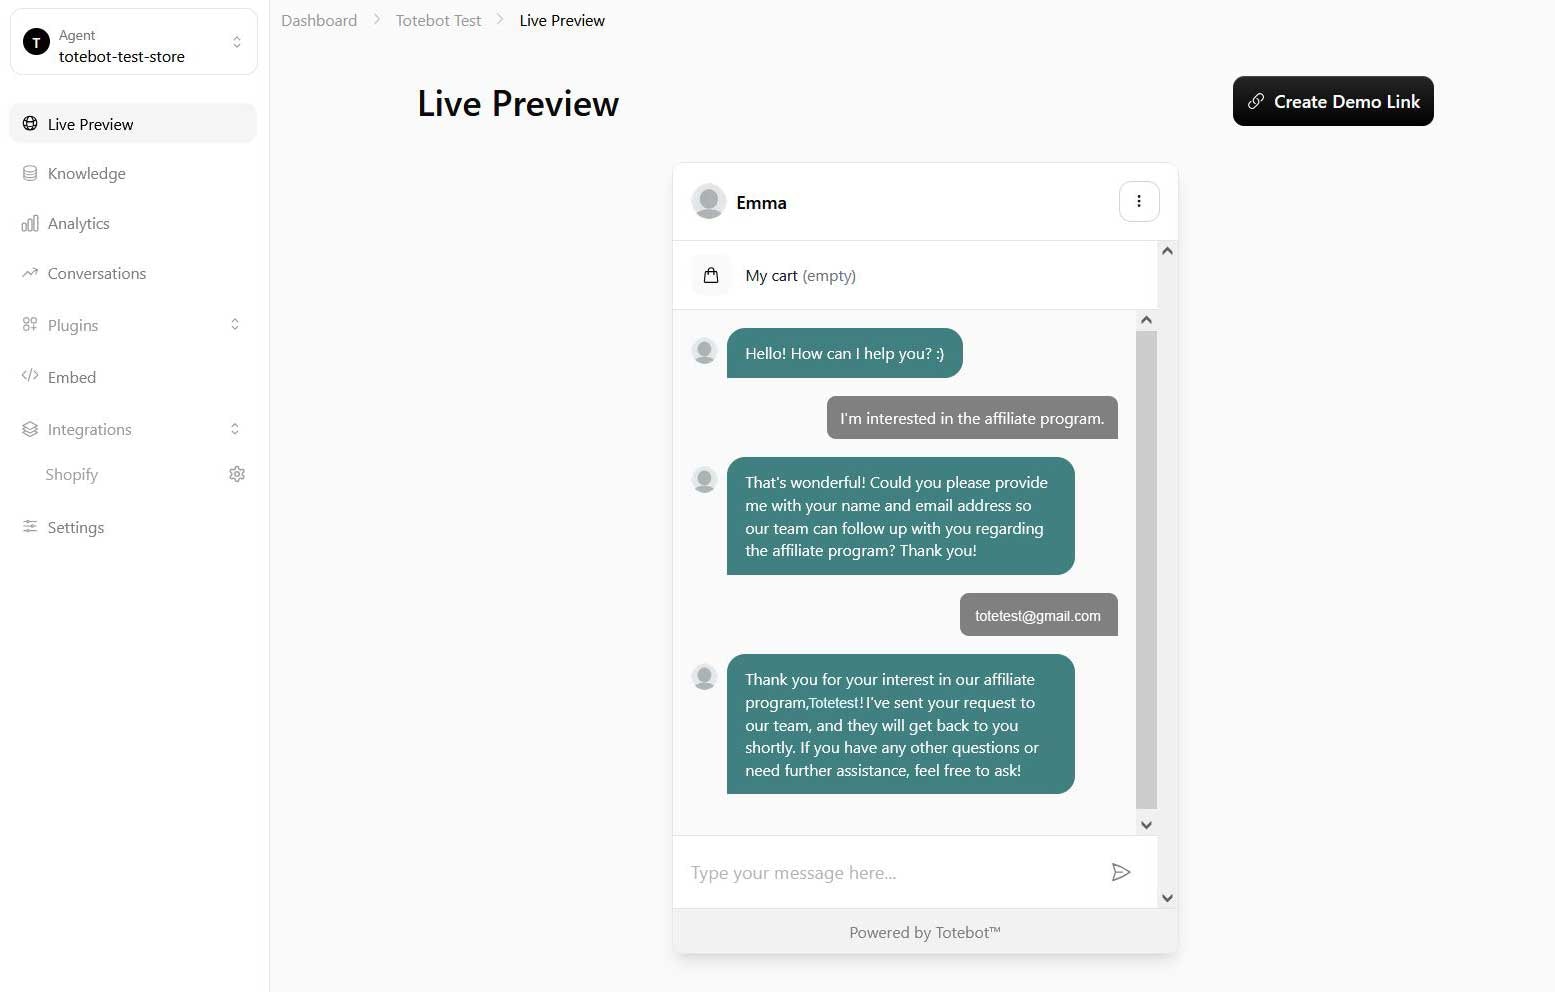
Lead
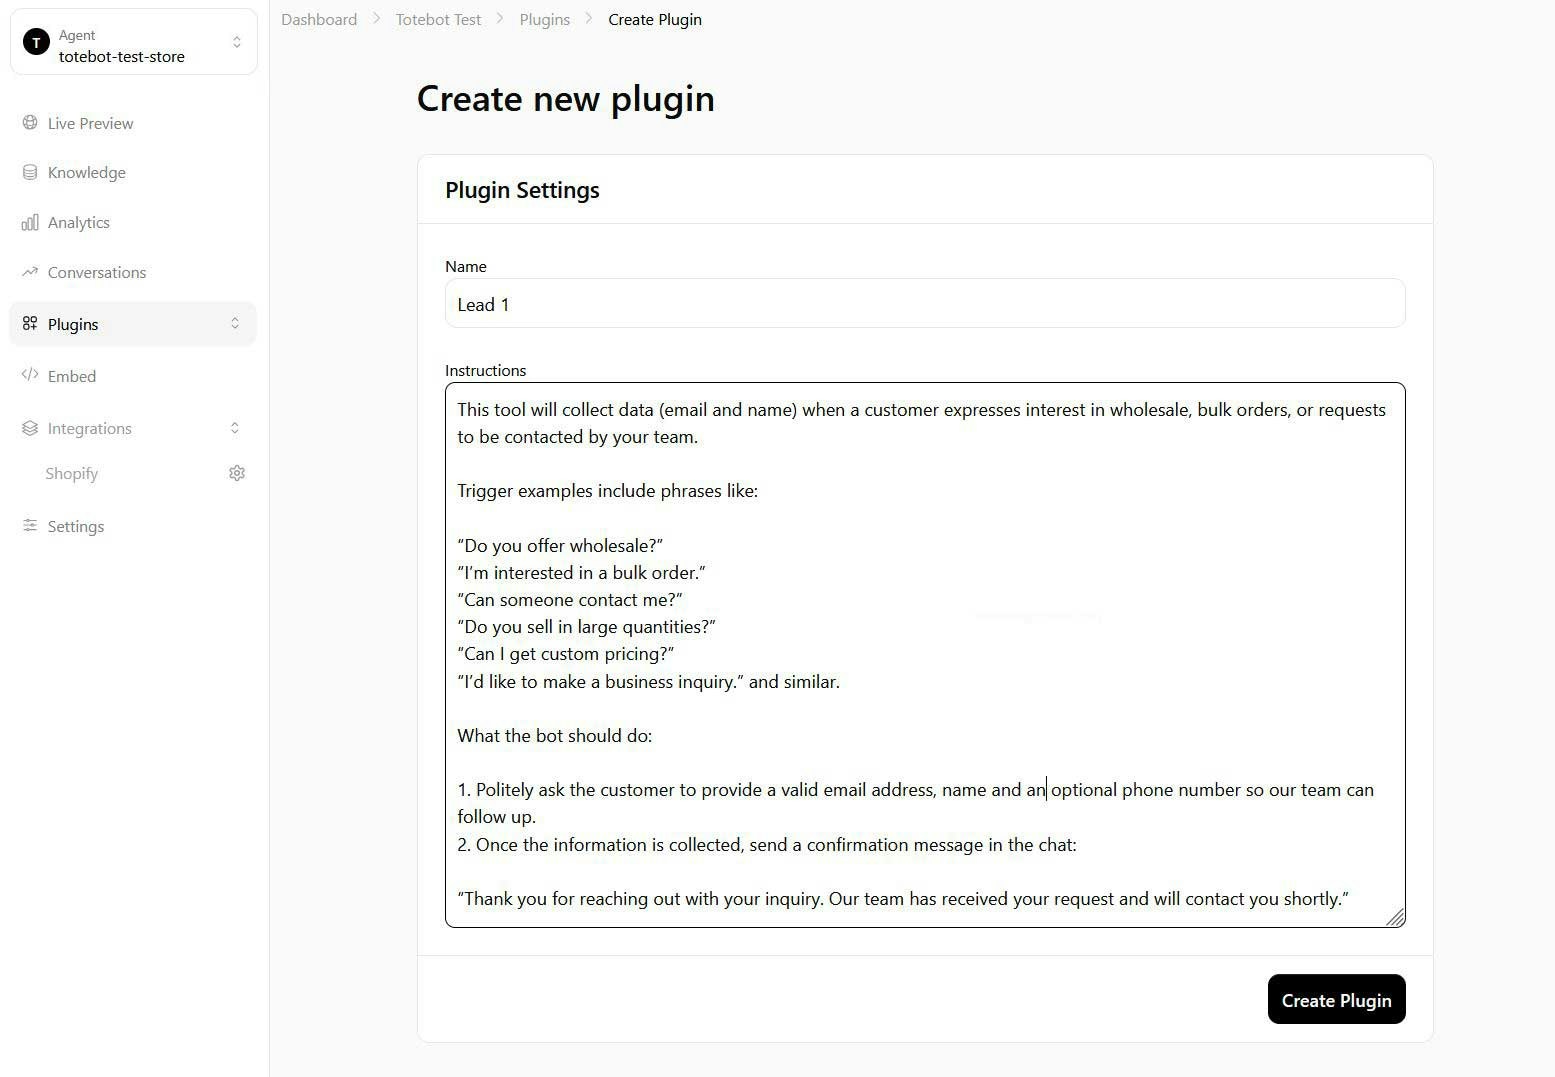
- Ask for their name
- Ask for their email or phone number
- Optionally ask for company name, budget, or other relevant info
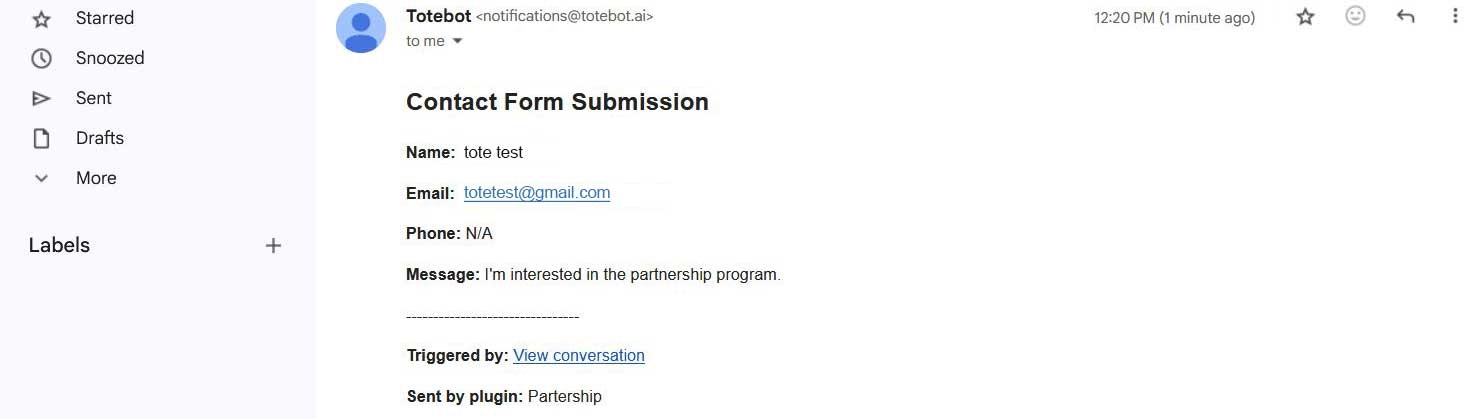
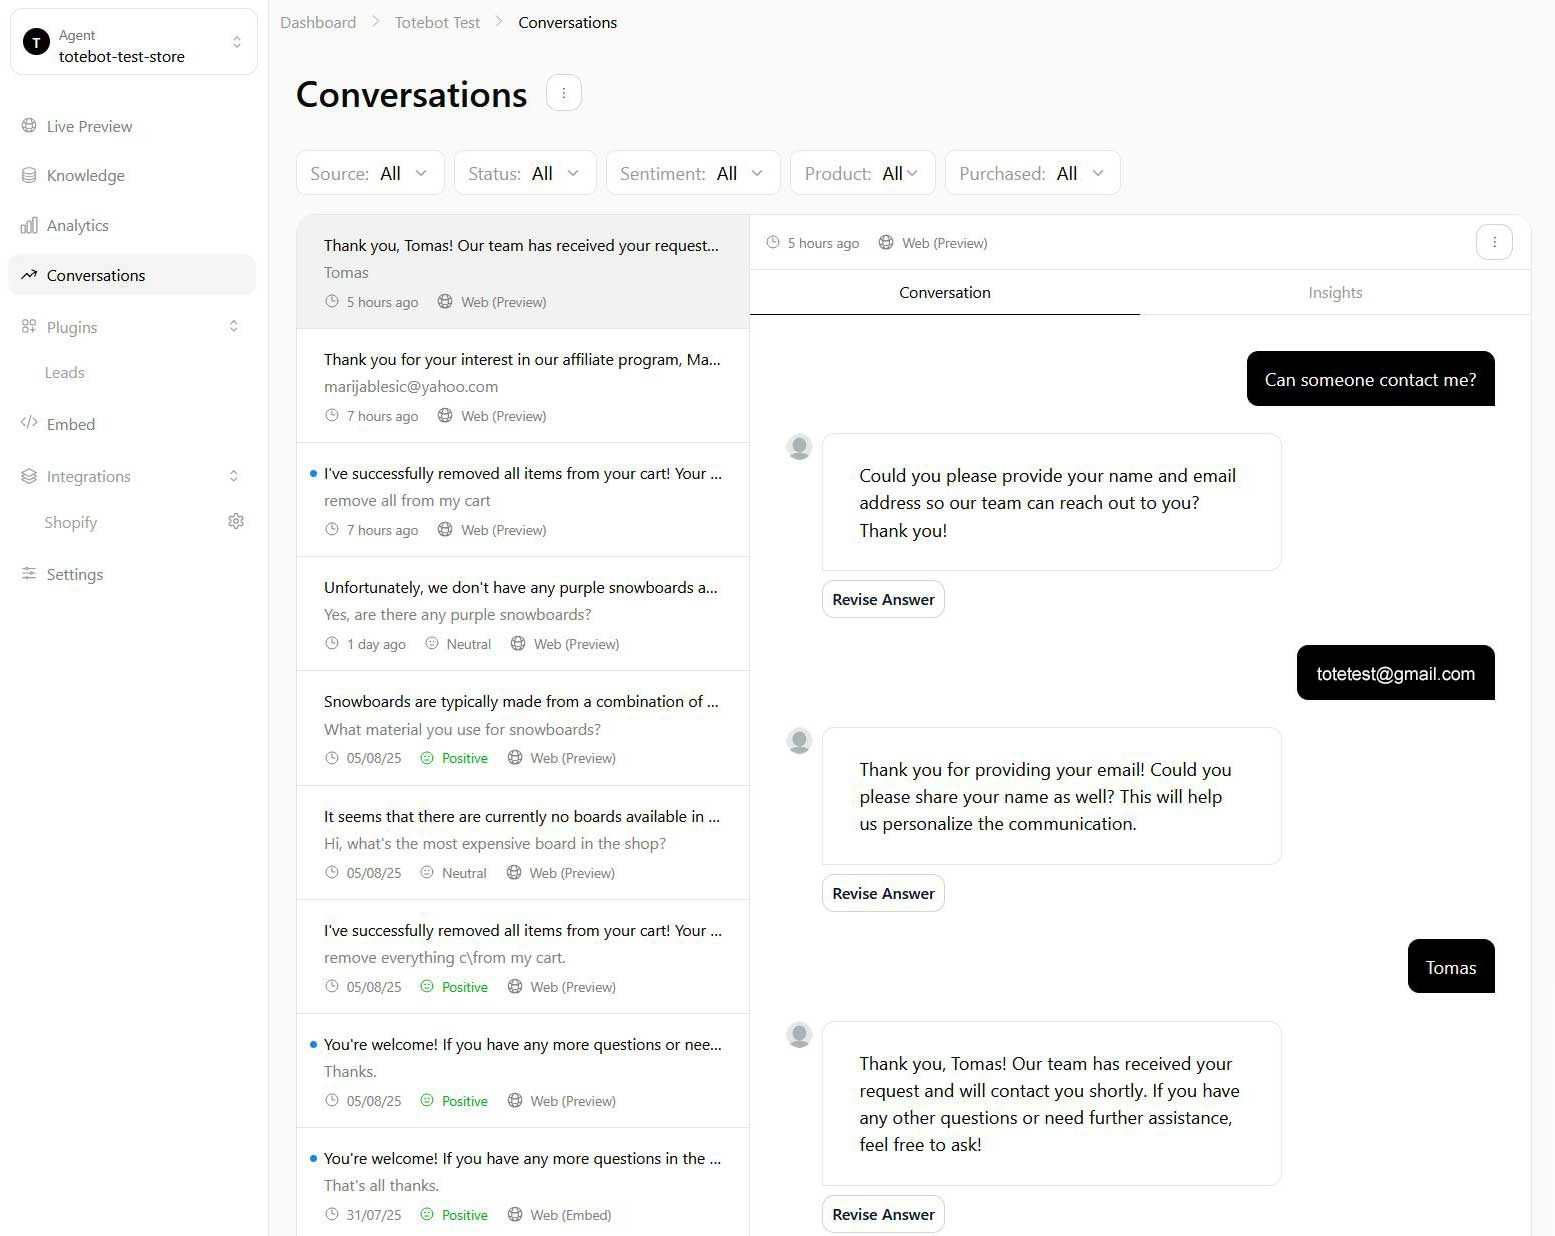
- Saves the lead (name + email)
- Saves this conversation on the Dashboard
- Confirms to the user: “Thanks! Our team will reach out to you shortly.”
Testing Lead Action
You should test the Lead Action in your chat by writing sentences similar to the trigger phrases defined in your instructions. This will help you check if any adjustments are needed.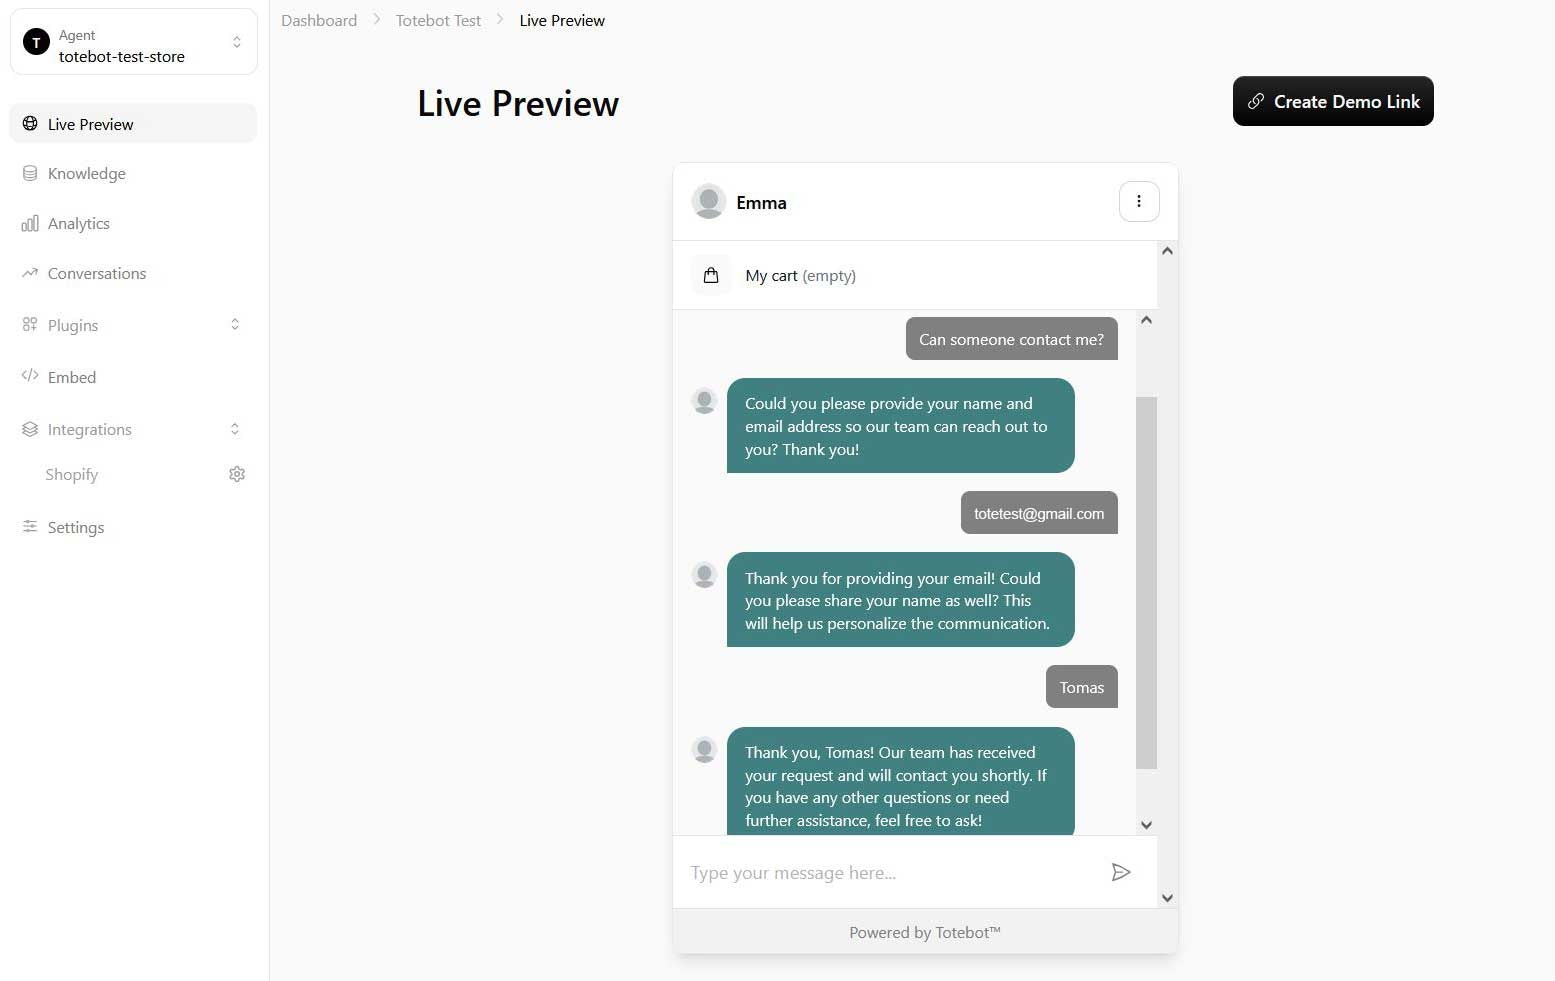

API Call

Web Search
The Web Search action lets your agent search the web to answer questions that go beyond your knowledge base, such as current events or third-party information. You can restrict searches with Include Domains: when set, the agent only searches the domains you list (for example, your own site or trusted sources). Leave it empty to search the whole web.Custom Button
The Custom Button action shows a clickable button in the chat when the conversation matches your instructions. Define:- Button Label: the text on the button (e.g., “Book a demo”).
- Button URL: where the button takes the customer.