> ## Documentation Index
> Fetch the complete documentation index at: https://docs.totebot.ai/llms.txt
> Use this file to discover all available pages before exploring further.
# User Guide: Set Up Your Agent
> Complete setup guide for your Totebot AI agent
This is a complete guide to setting up and launching your first AI agent with Totebot, whether you run an online store, take bookings, or handle customer support.
## Step 1: Create an Account
Visit [Totebot.ai](https://Totebot.ai)
Click **Sign In** in the top-right corner.
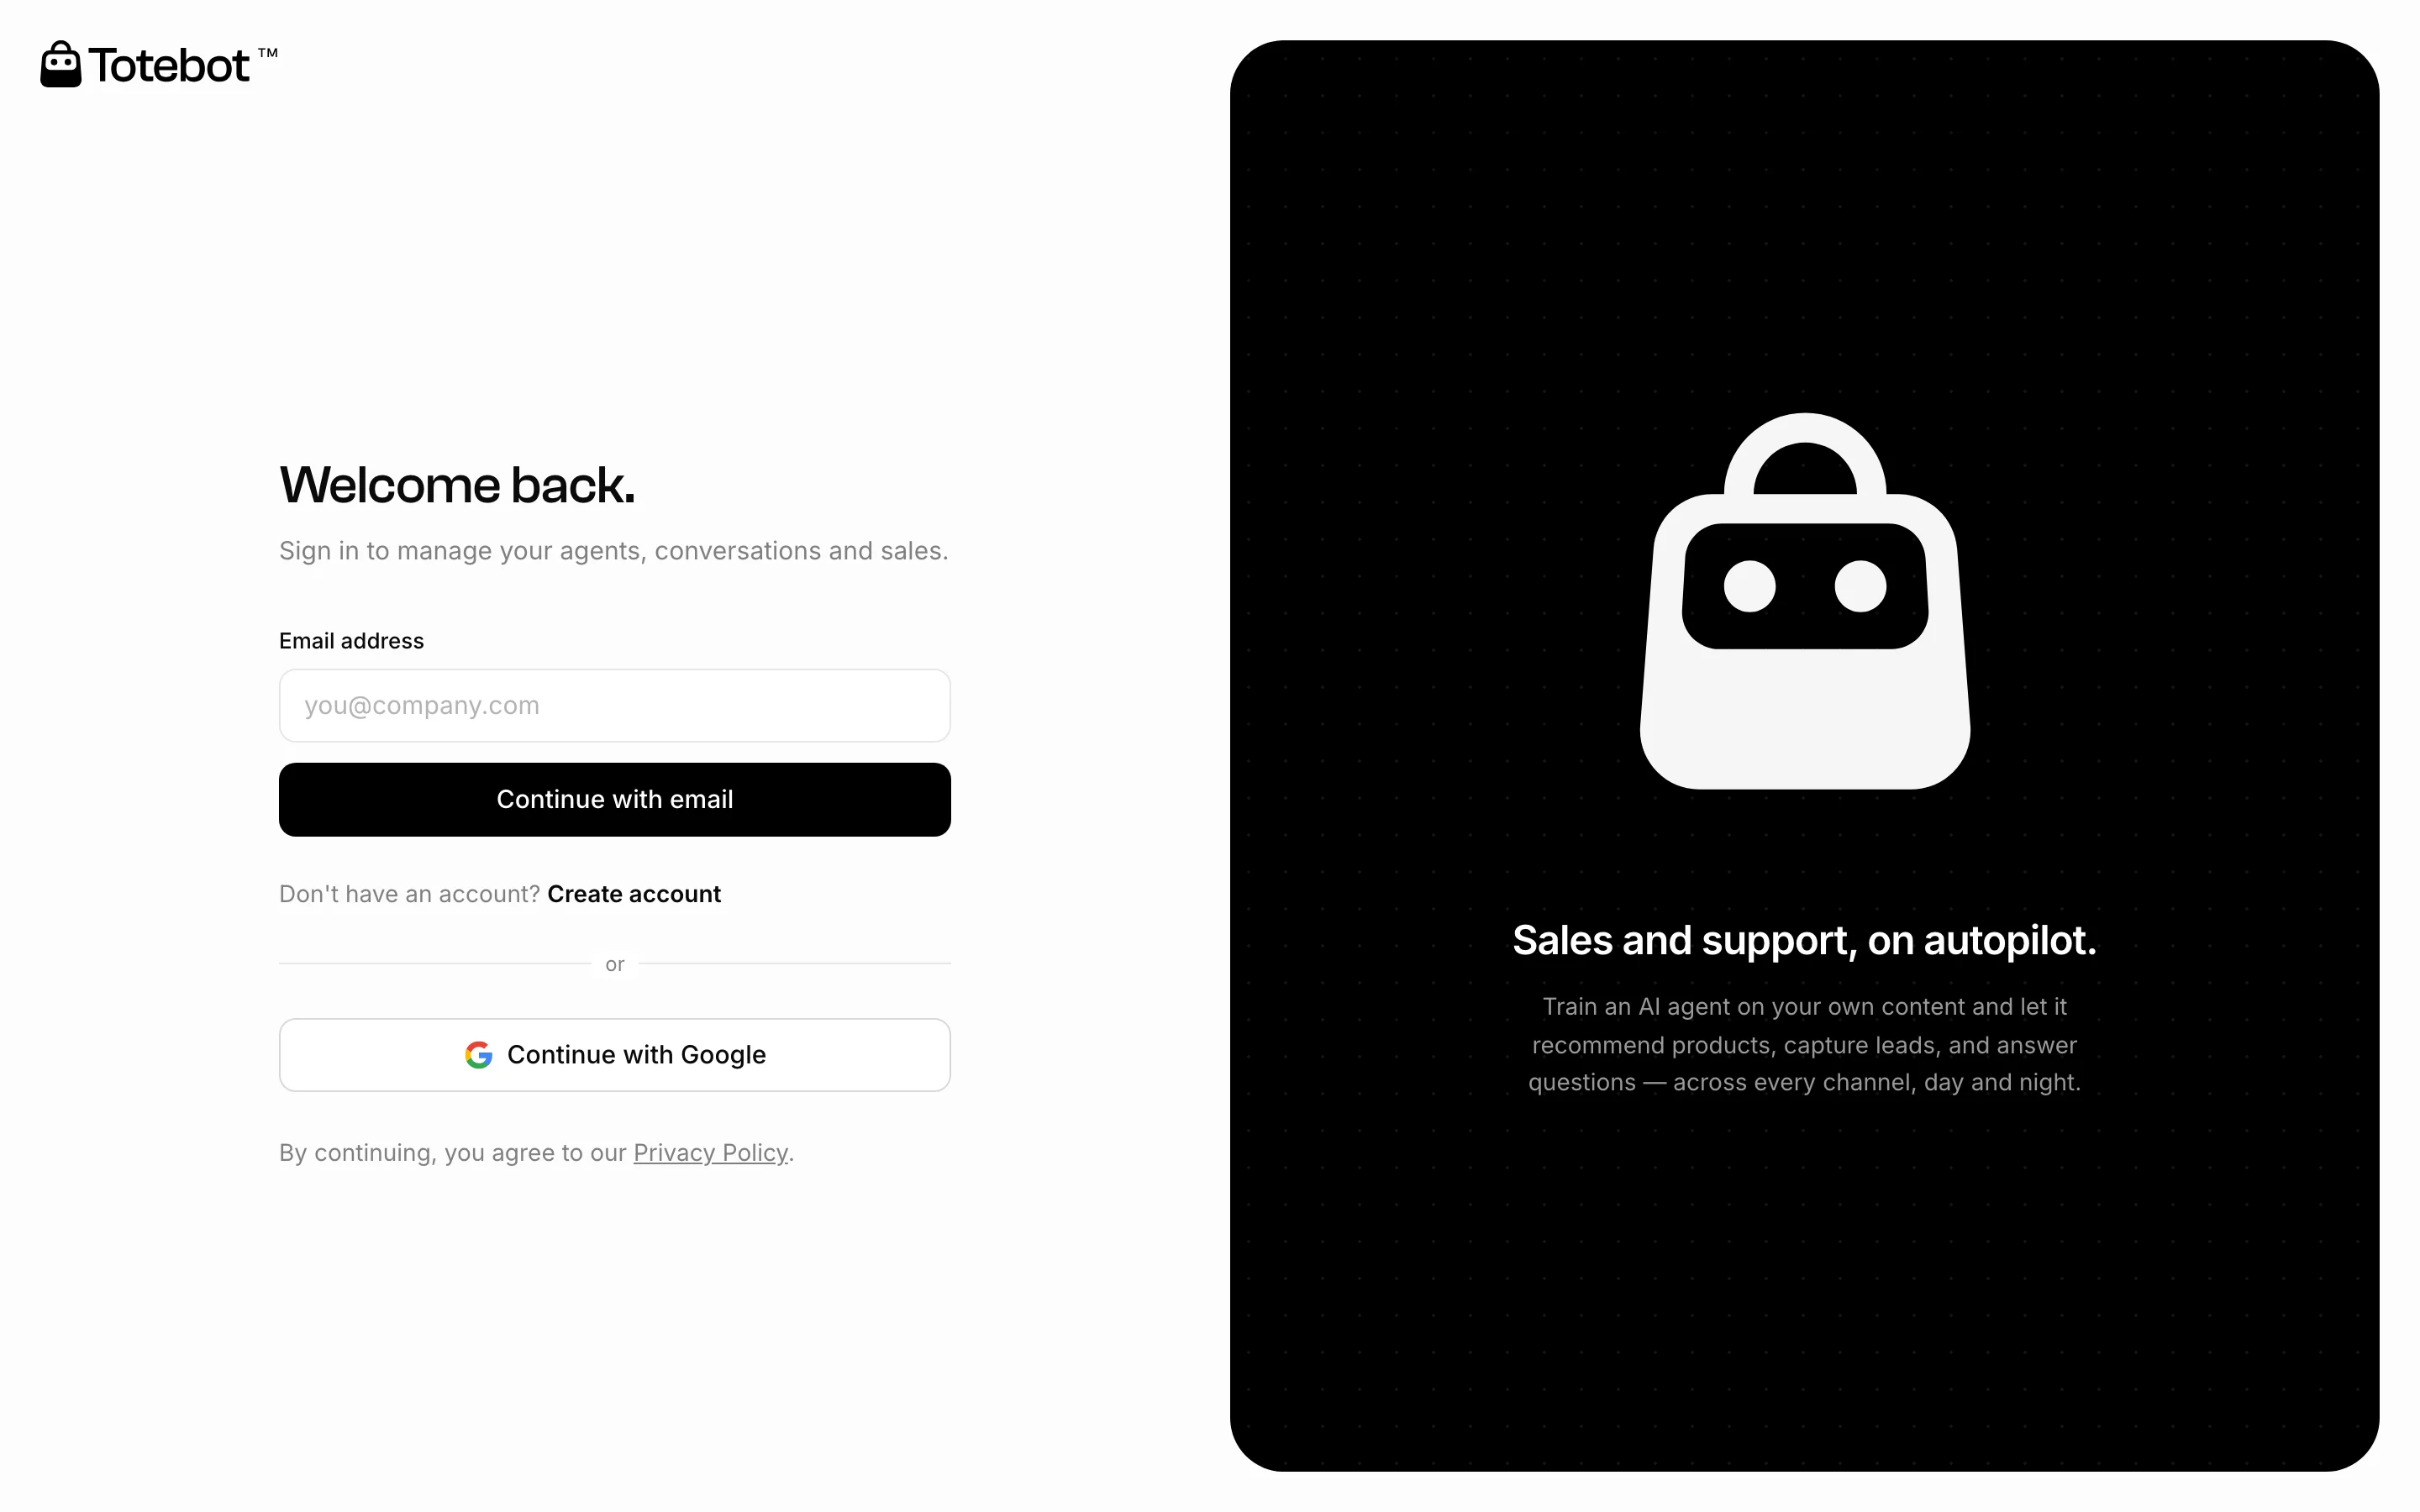
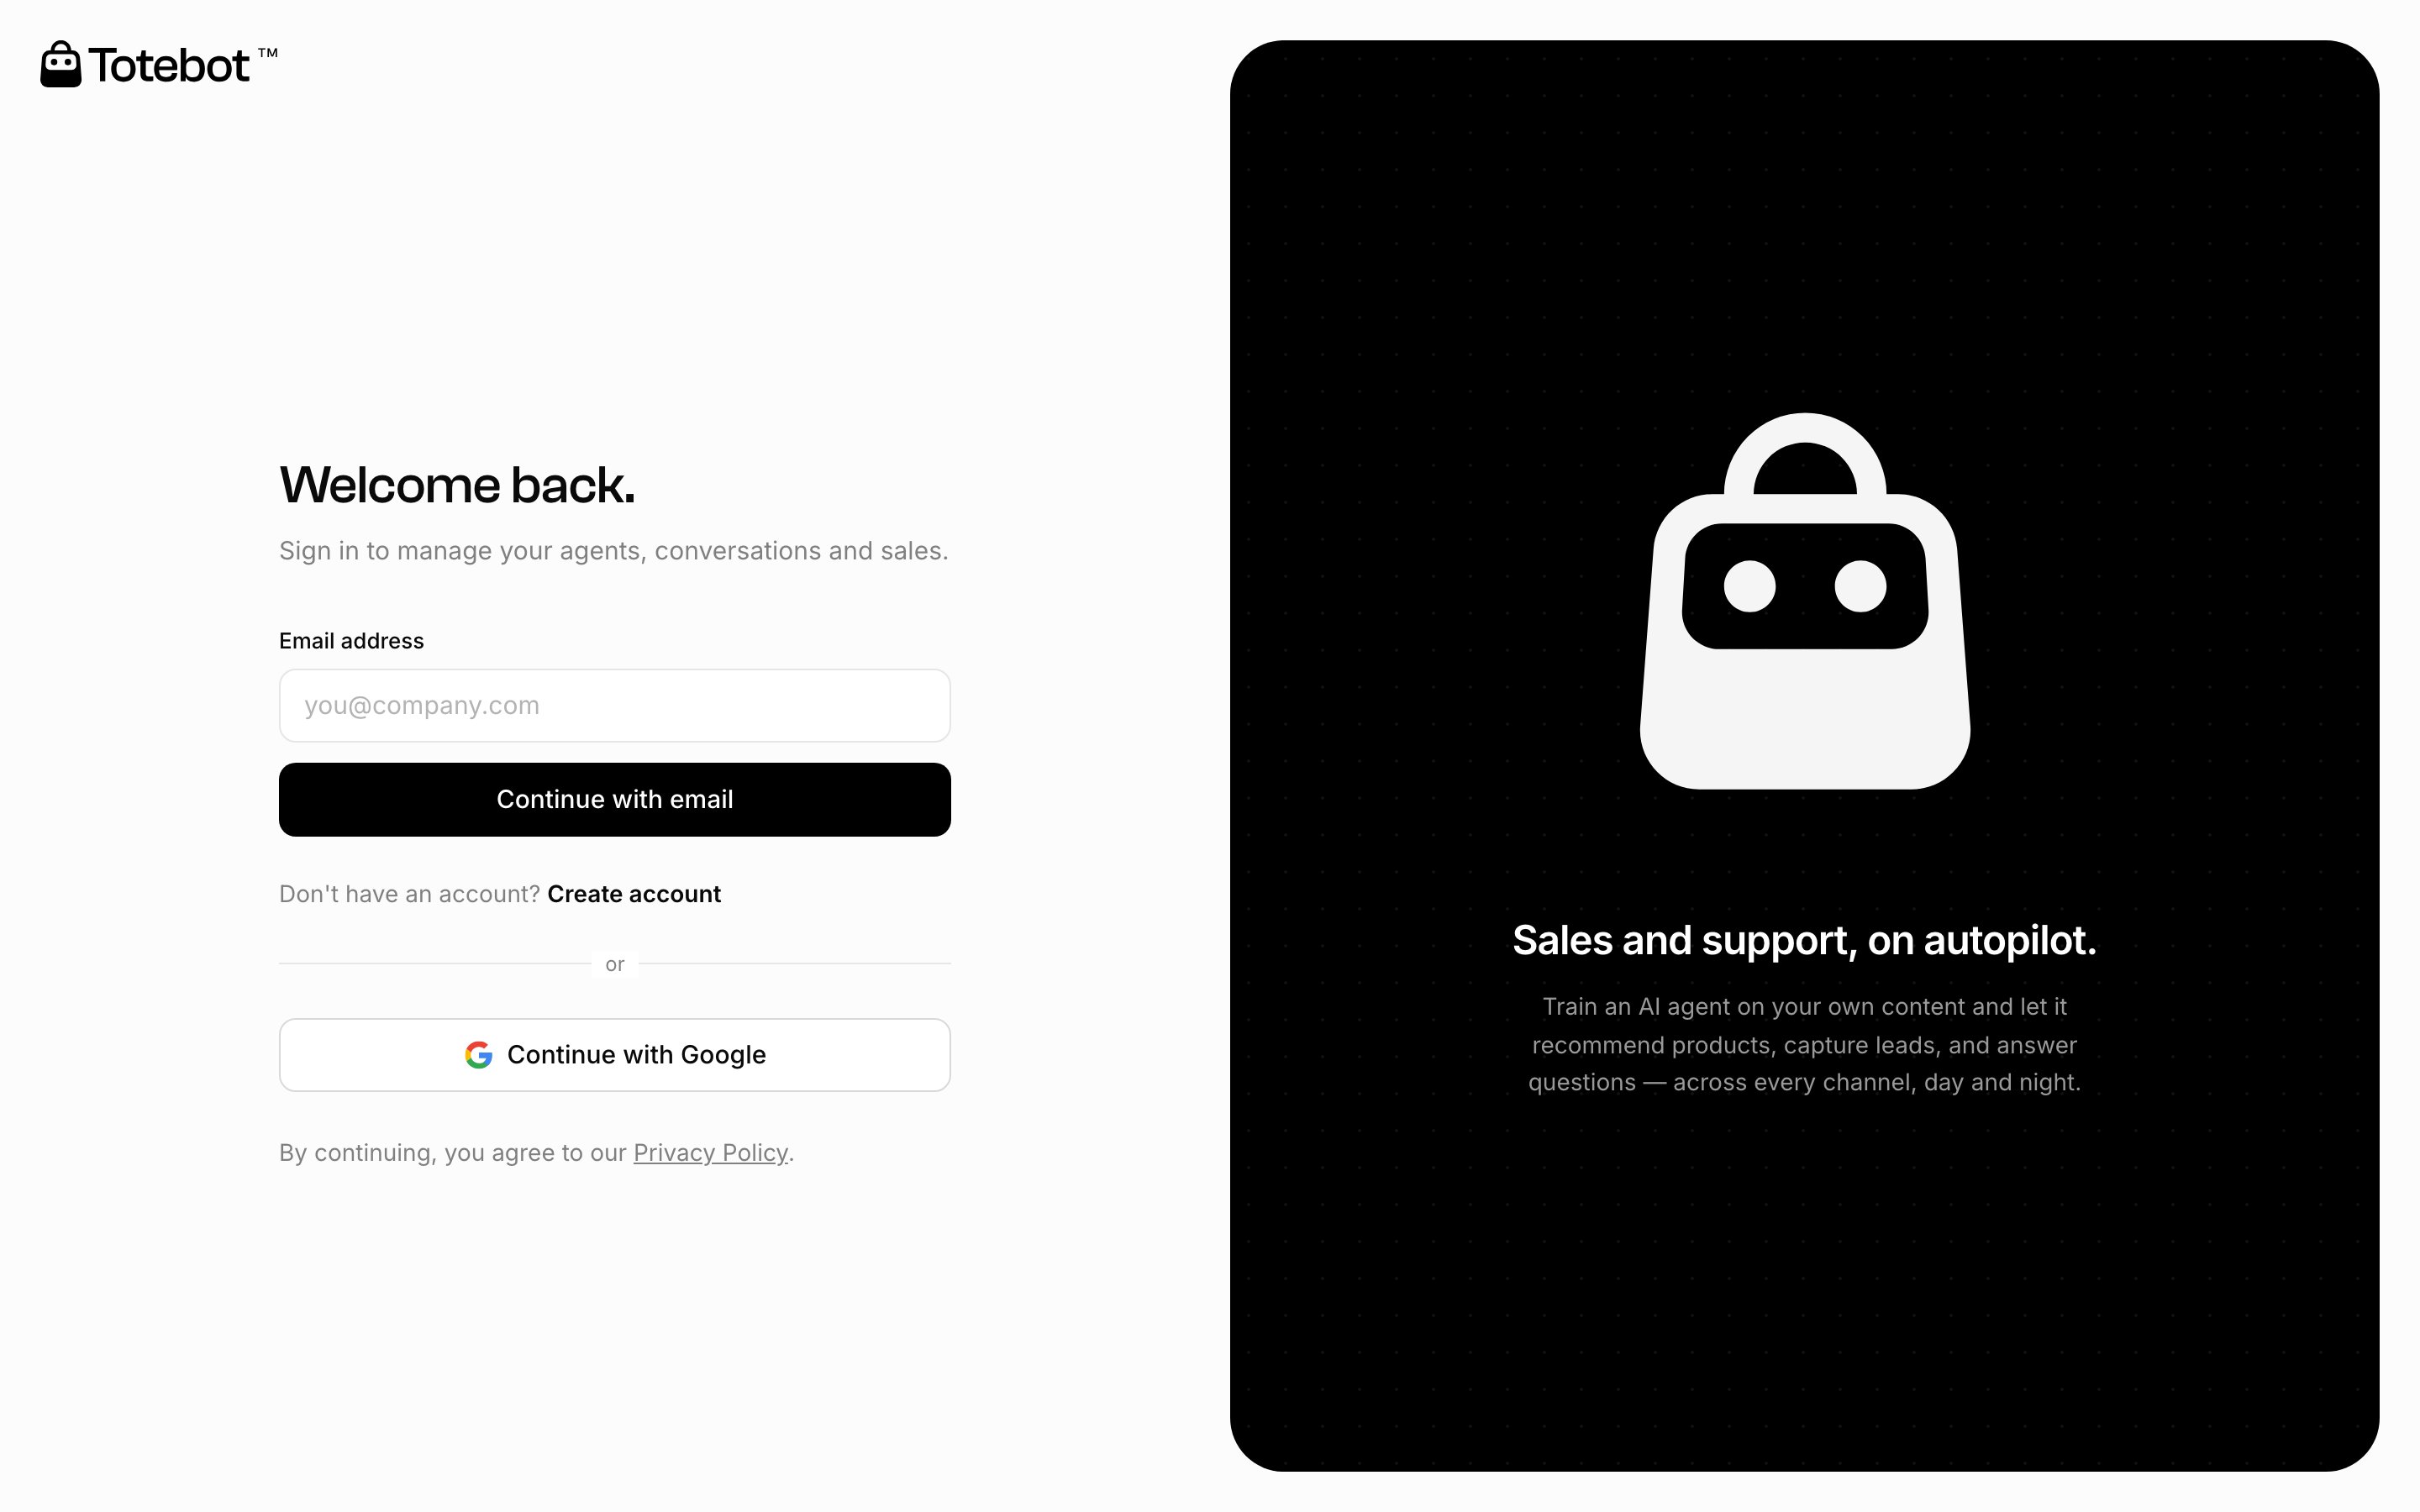 Choose to log in with your email and password, or sign in with your Google account.
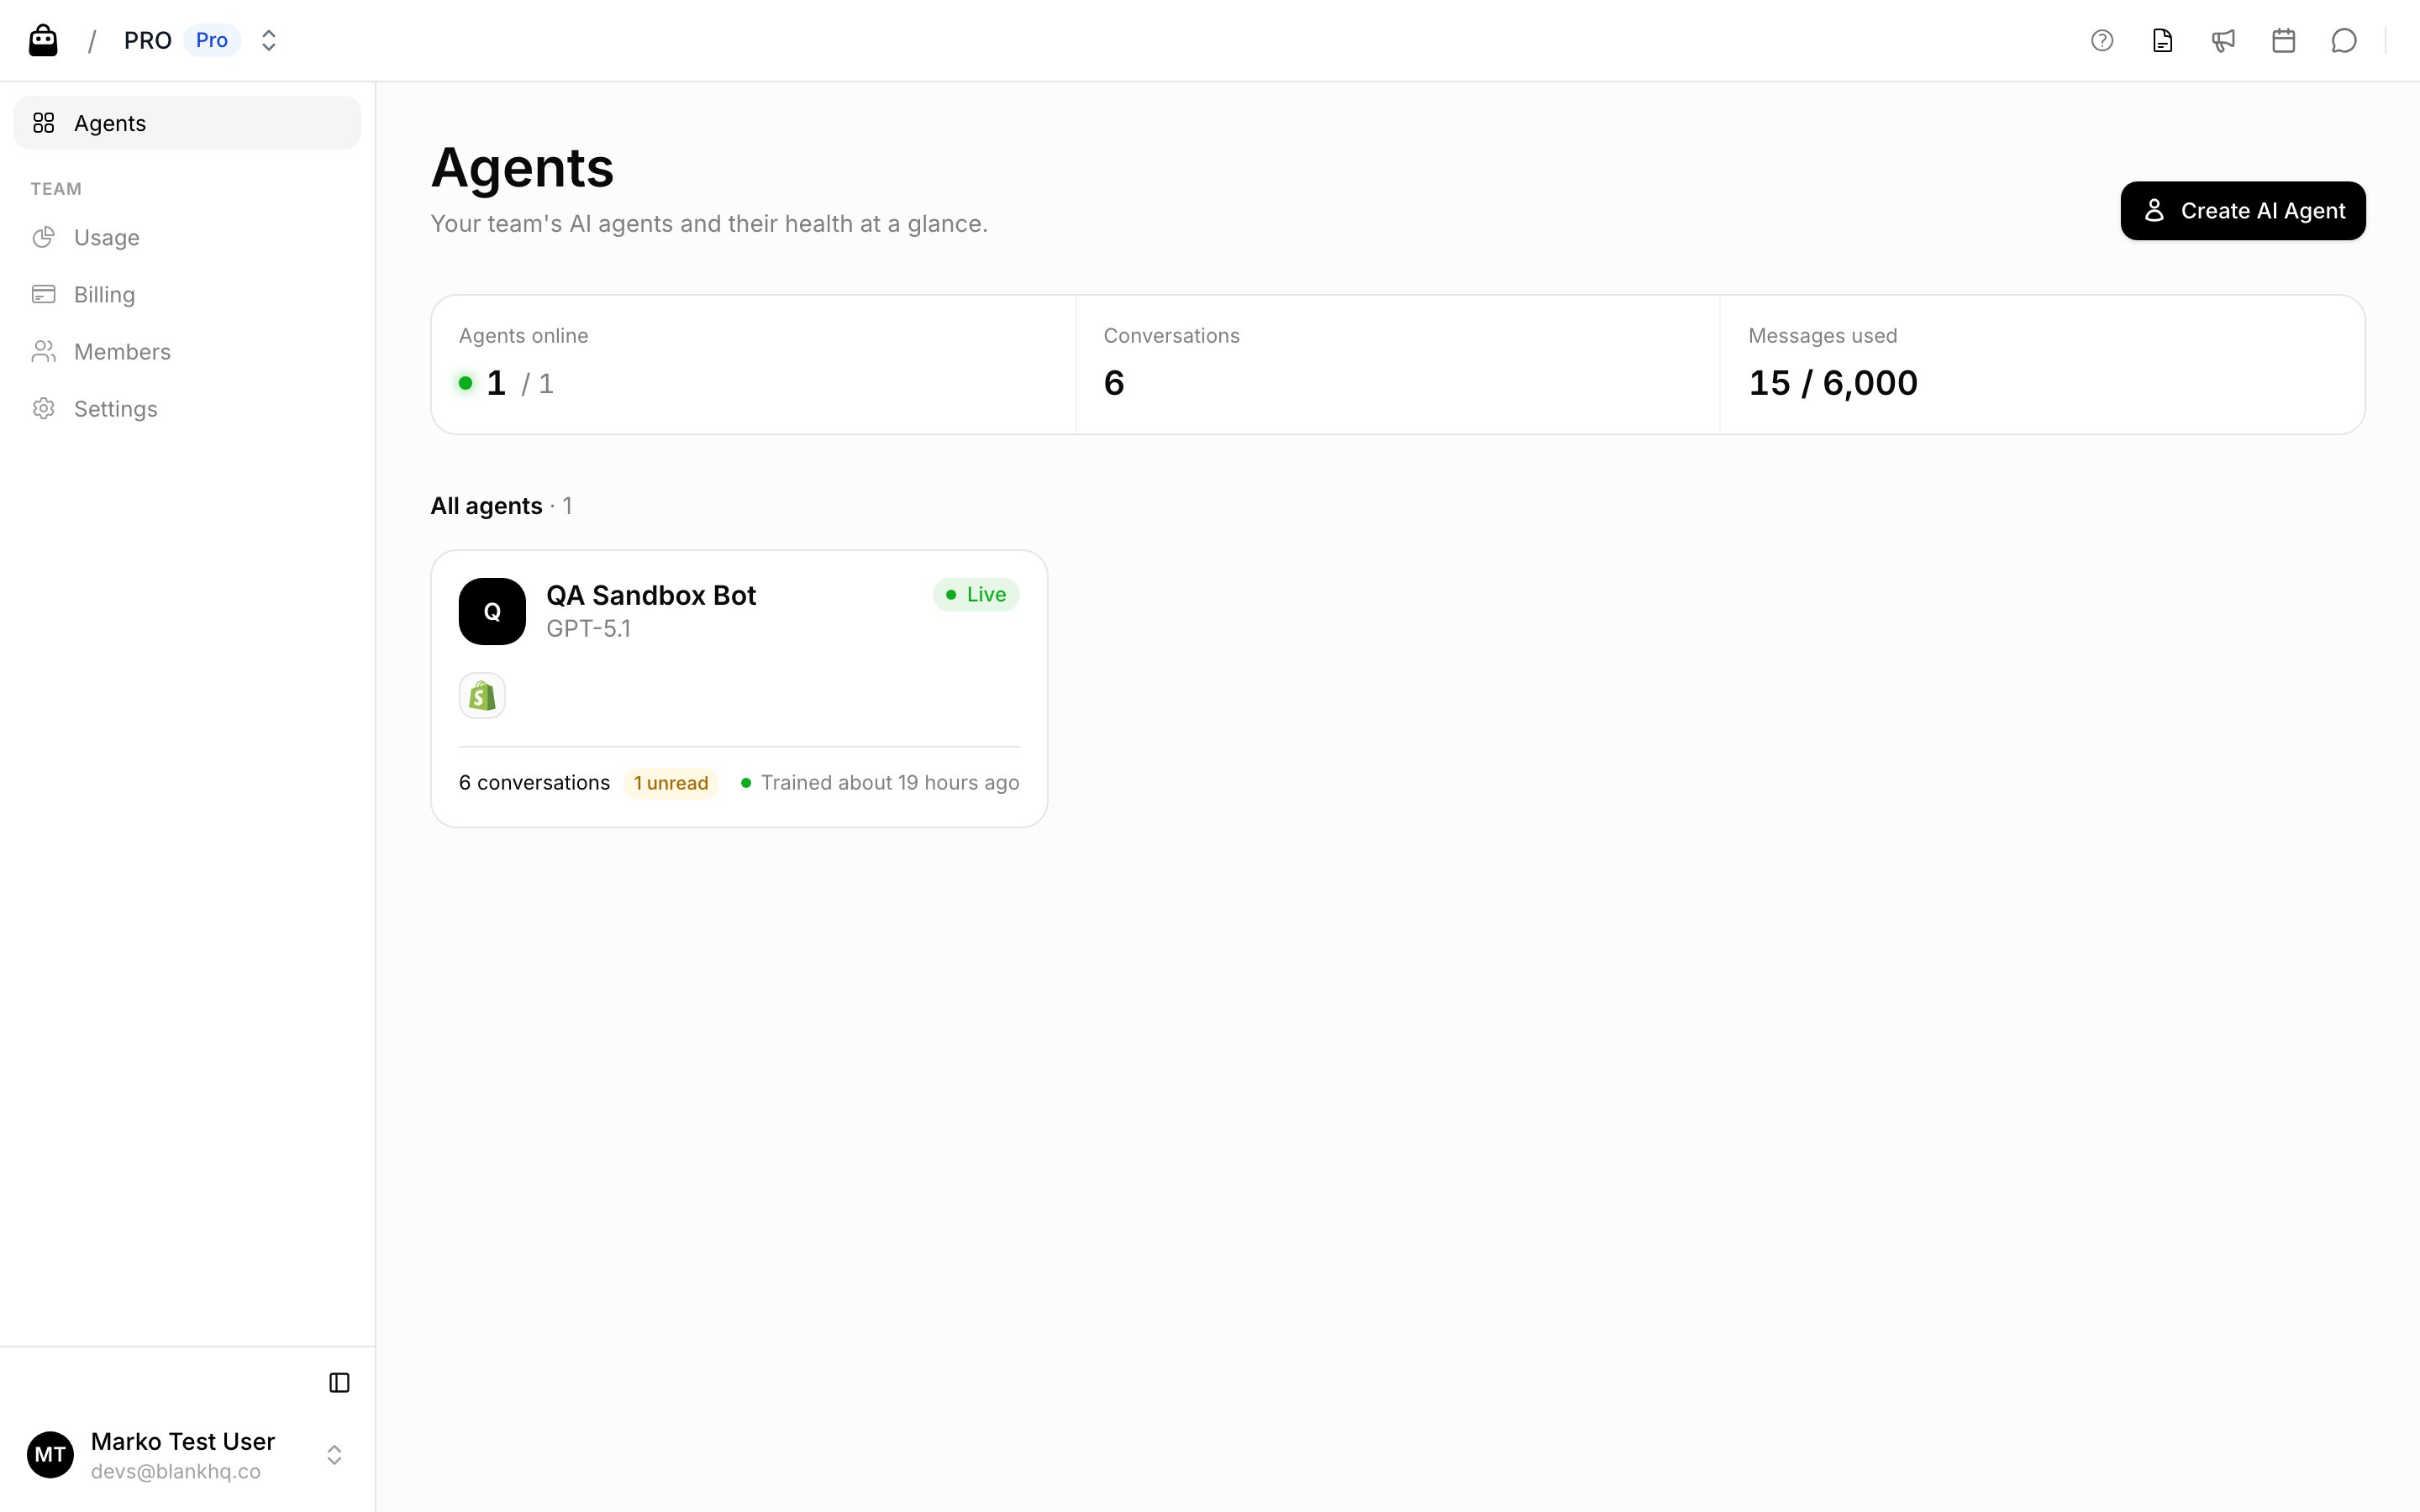
 Start creating your first AI Agent by clicking the **Create AI Agent** button.
 Choose what best describes your business, then click **Continue**.
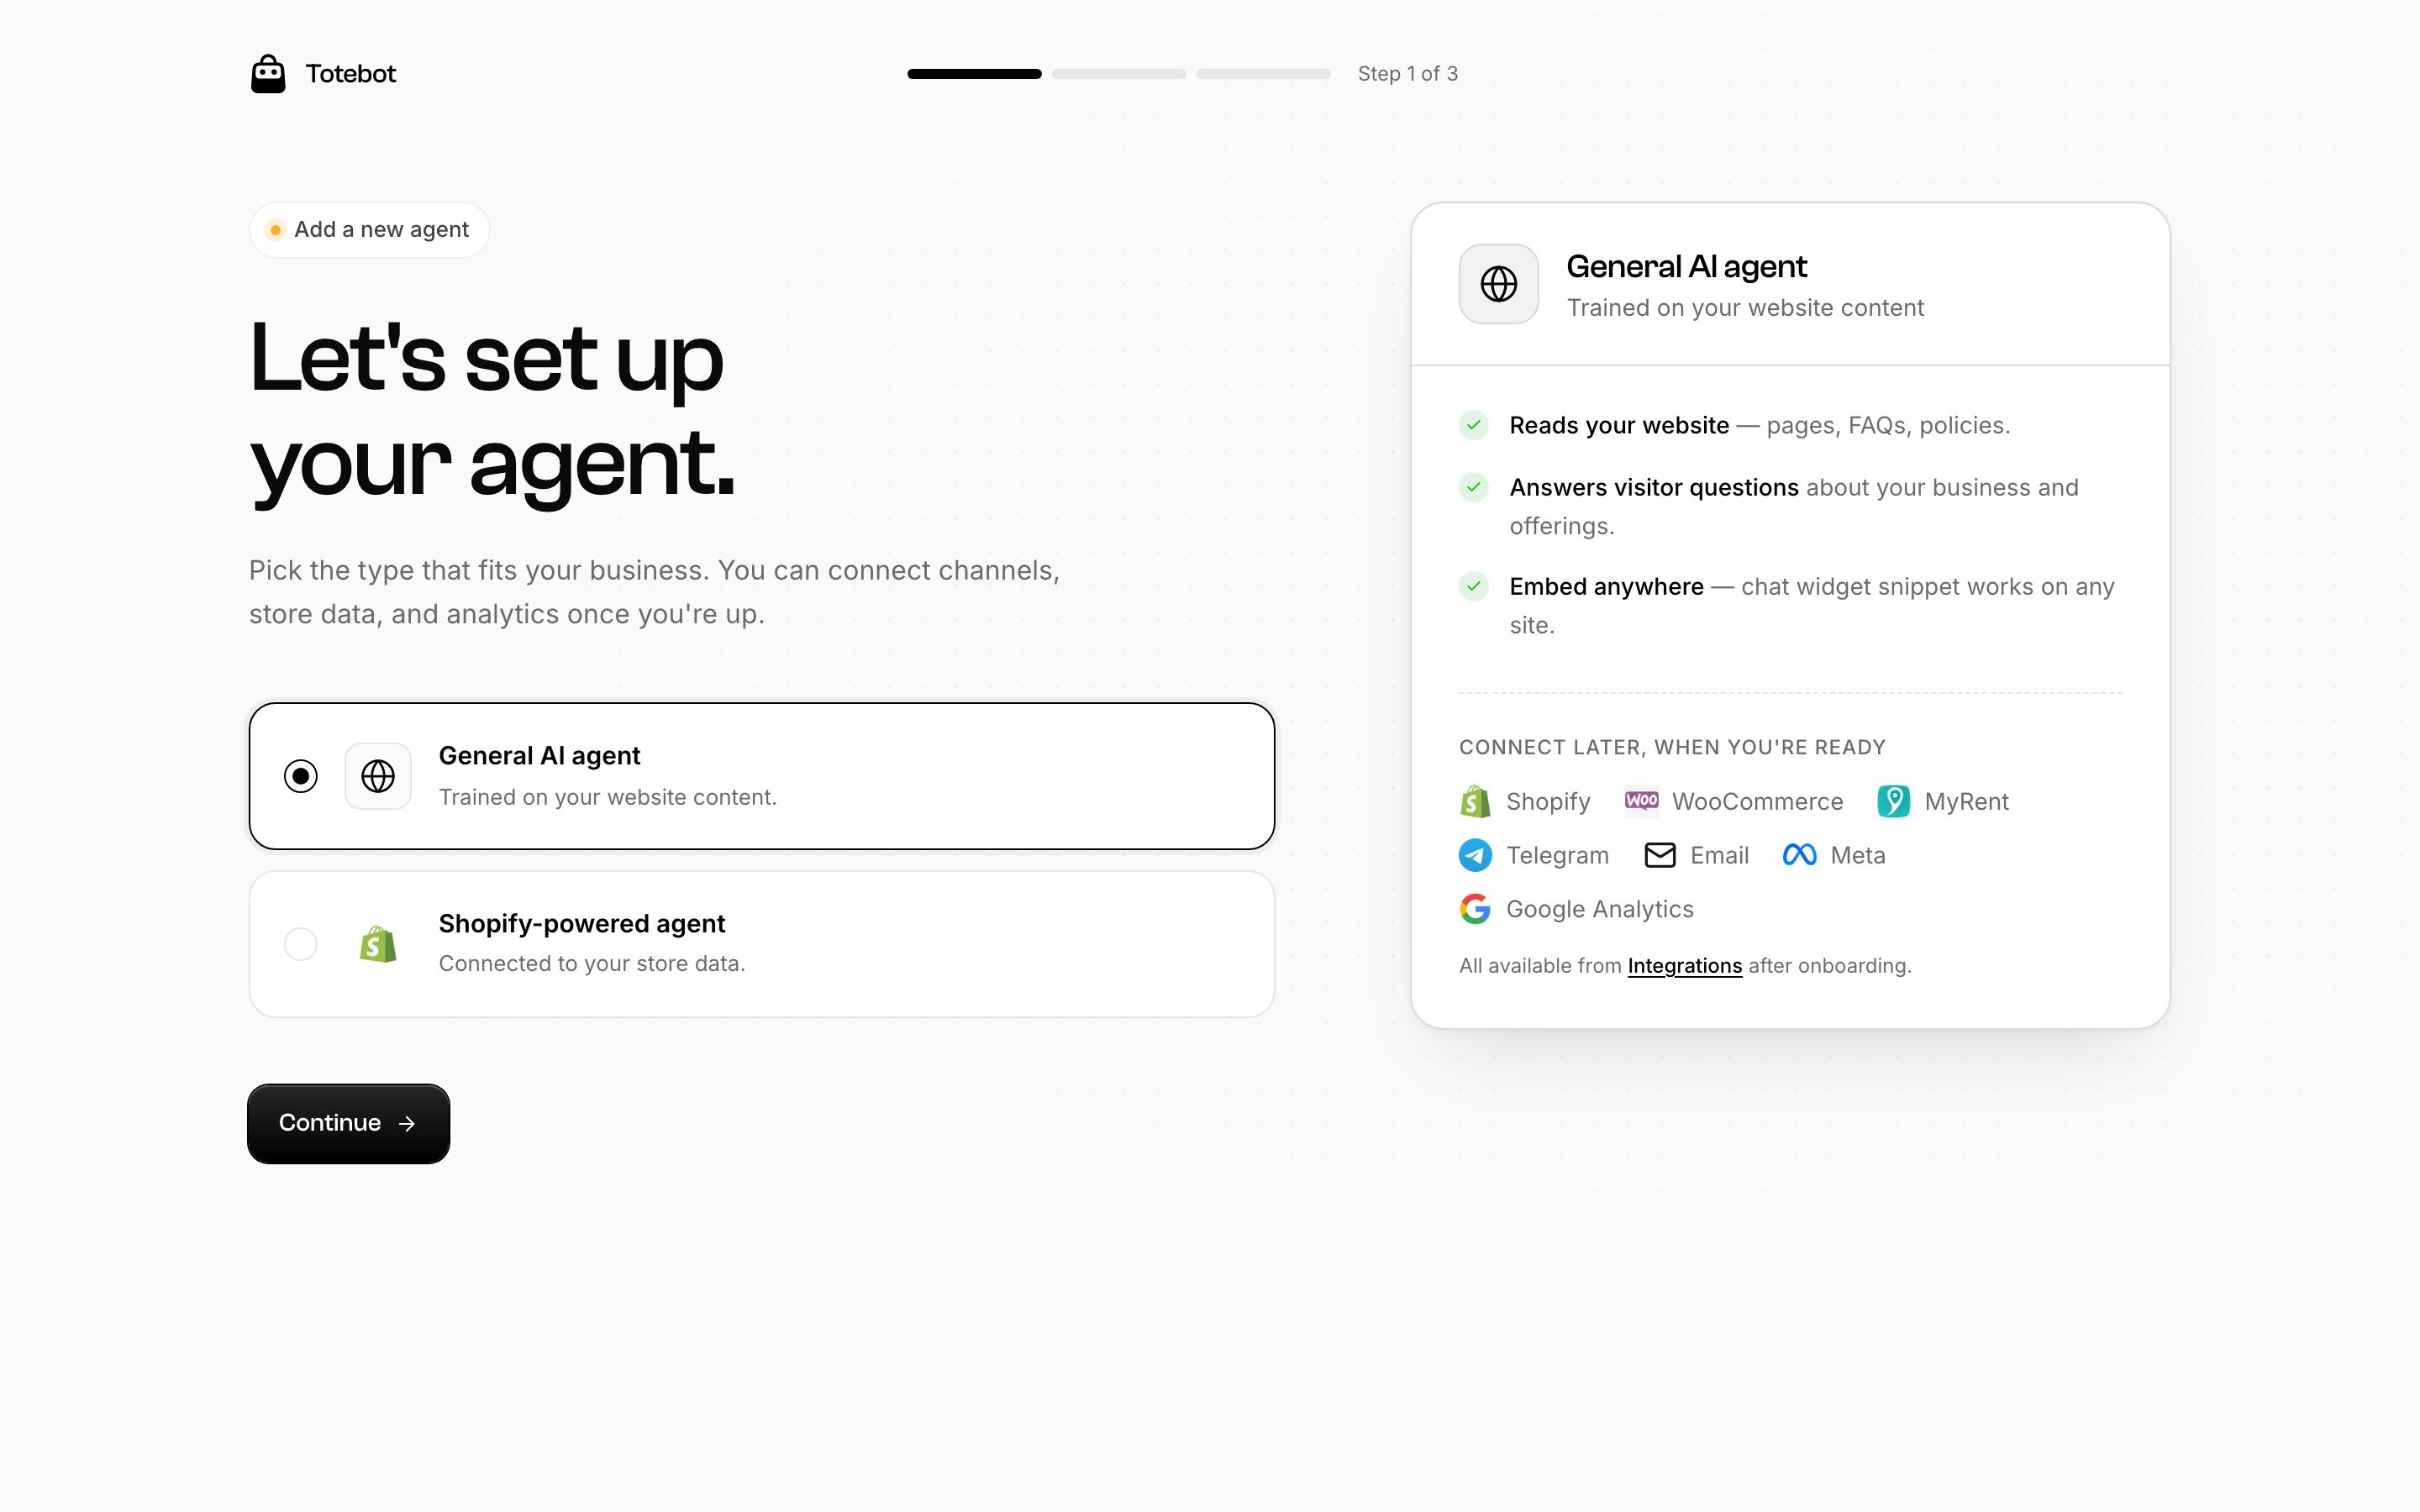 Totebot works for online stores (Shopify, WooCommerce, or a custom store), property rentals, and support or services businesses with no online shop at all. If you have a store, have your website URL ready.
## Step 2: Connect a Store or Channel
Connect your agent to where your customers are. This guide uses **Shopify** as the example, but the same applies to the other options:
* **Stores**: [Shopify](/integrations/shopify), [WooCommerce](/integrations/woocommerce), or a [Custom Webshop](/integrations/custom-webshop)
* **Channels**: [Web Widget](/integrations/web-widget), [WhatsApp](/integrations/whatsapp), [Telegram](/integrations/telegram), or [Email](/integrations/email)
Let the agent scan product pages to enrich its answers. Click **Connect Shopify**.
Totebot works for online stores (Shopify, WooCommerce, or a custom store), property rentals, and support or services businesses with no online shop at all. If you have a store, have your website URL ready.
## Step 2: Connect a Store or Channel
Connect your agent to where your customers are. This guide uses **Shopify** as the example, but the same applies to the other options:
* **Stores**: [Shopify](/integrations/shopify), [WooCommerce](/integrations/woocommerce), or a [Custom Webshop](/integrations/custom-webshop)
* **Channels**: [Web Widget](/integrations/web-widget), [WhatsApp](/integrations/whatsapp), [Telegram](/integrations/telegram), or [Email](/integrations/email)
Let the agent scan product pages to enrich its answers. Click **Connect Shopify**.
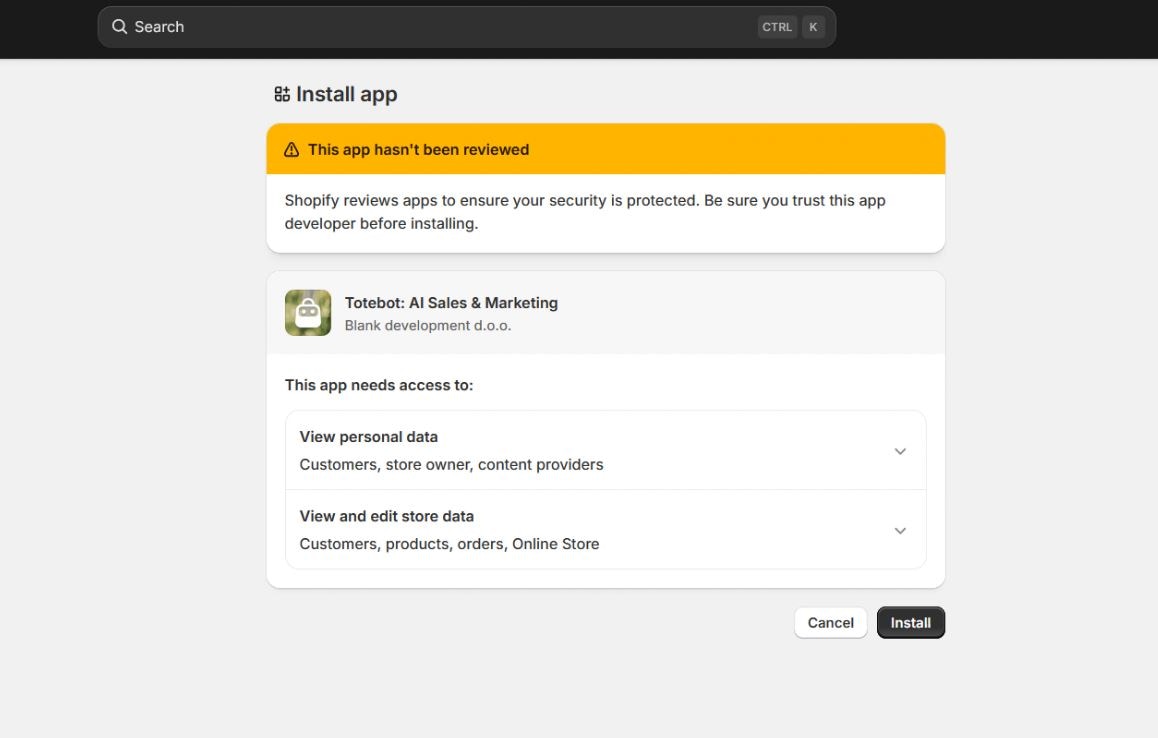
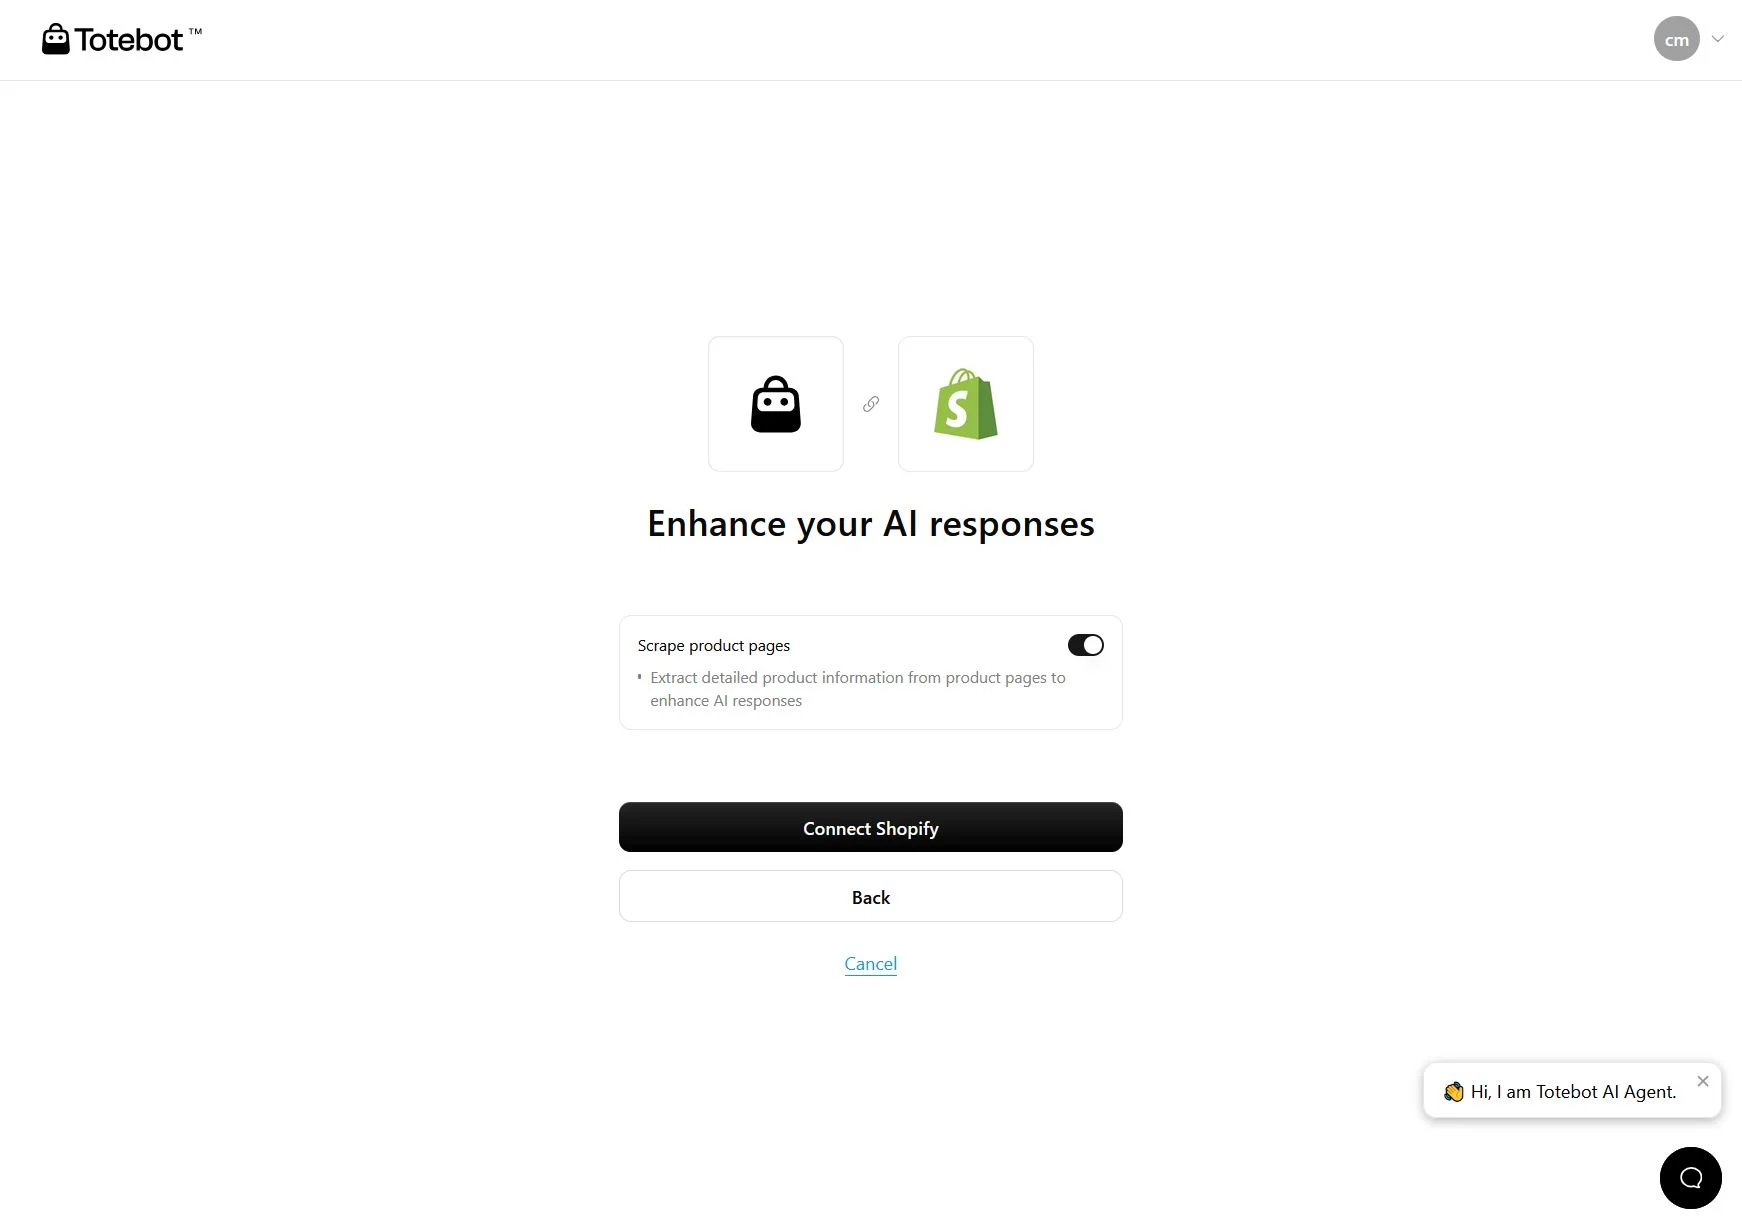 You will be automatically redirected to your Shopify store. Click **Install**.
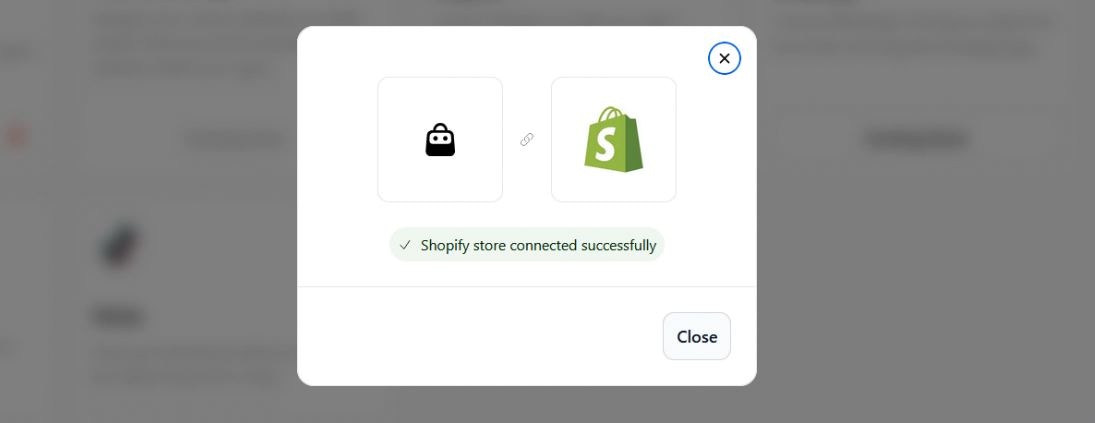
 After installation, you'll be redirected back to your Totebot dashboard with a confirmation message that your Shopify store is connected.
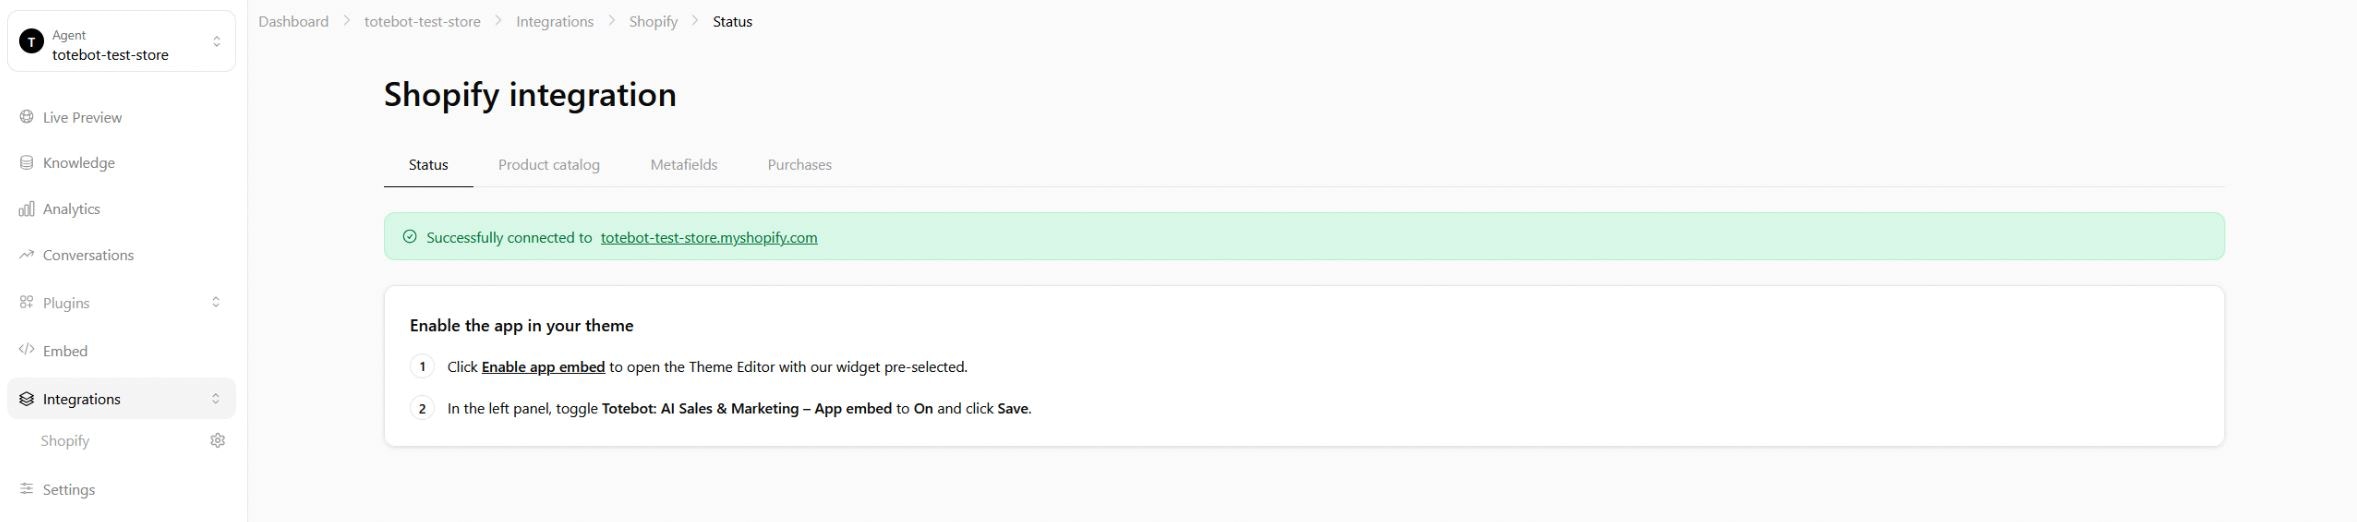
 You will land on the Integrations section of the Dashboard, where you'll confirm that your webshop is already connected. The name of your agent will be automatically assigned based on the name of your webshop; however, you can change it at any time if needed.
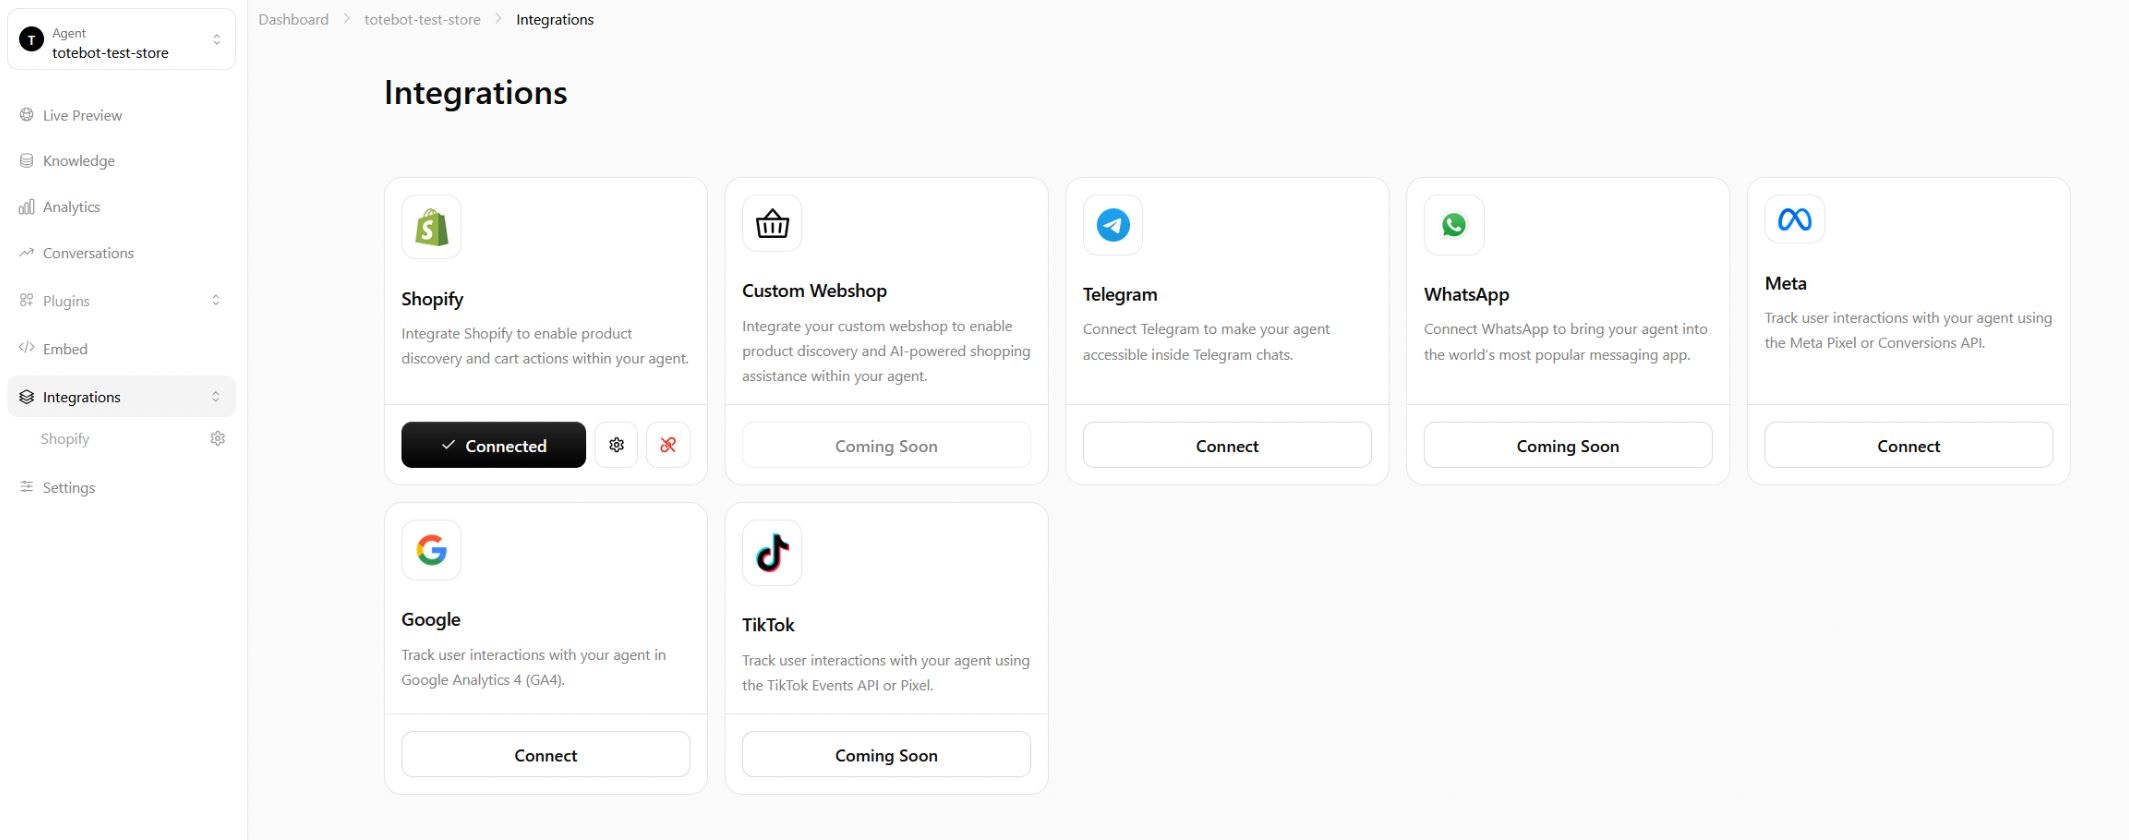 If you click on the Settings gear, additional insights will open. Under **Status**, you can confirm once again that the Totebot app is enabled.
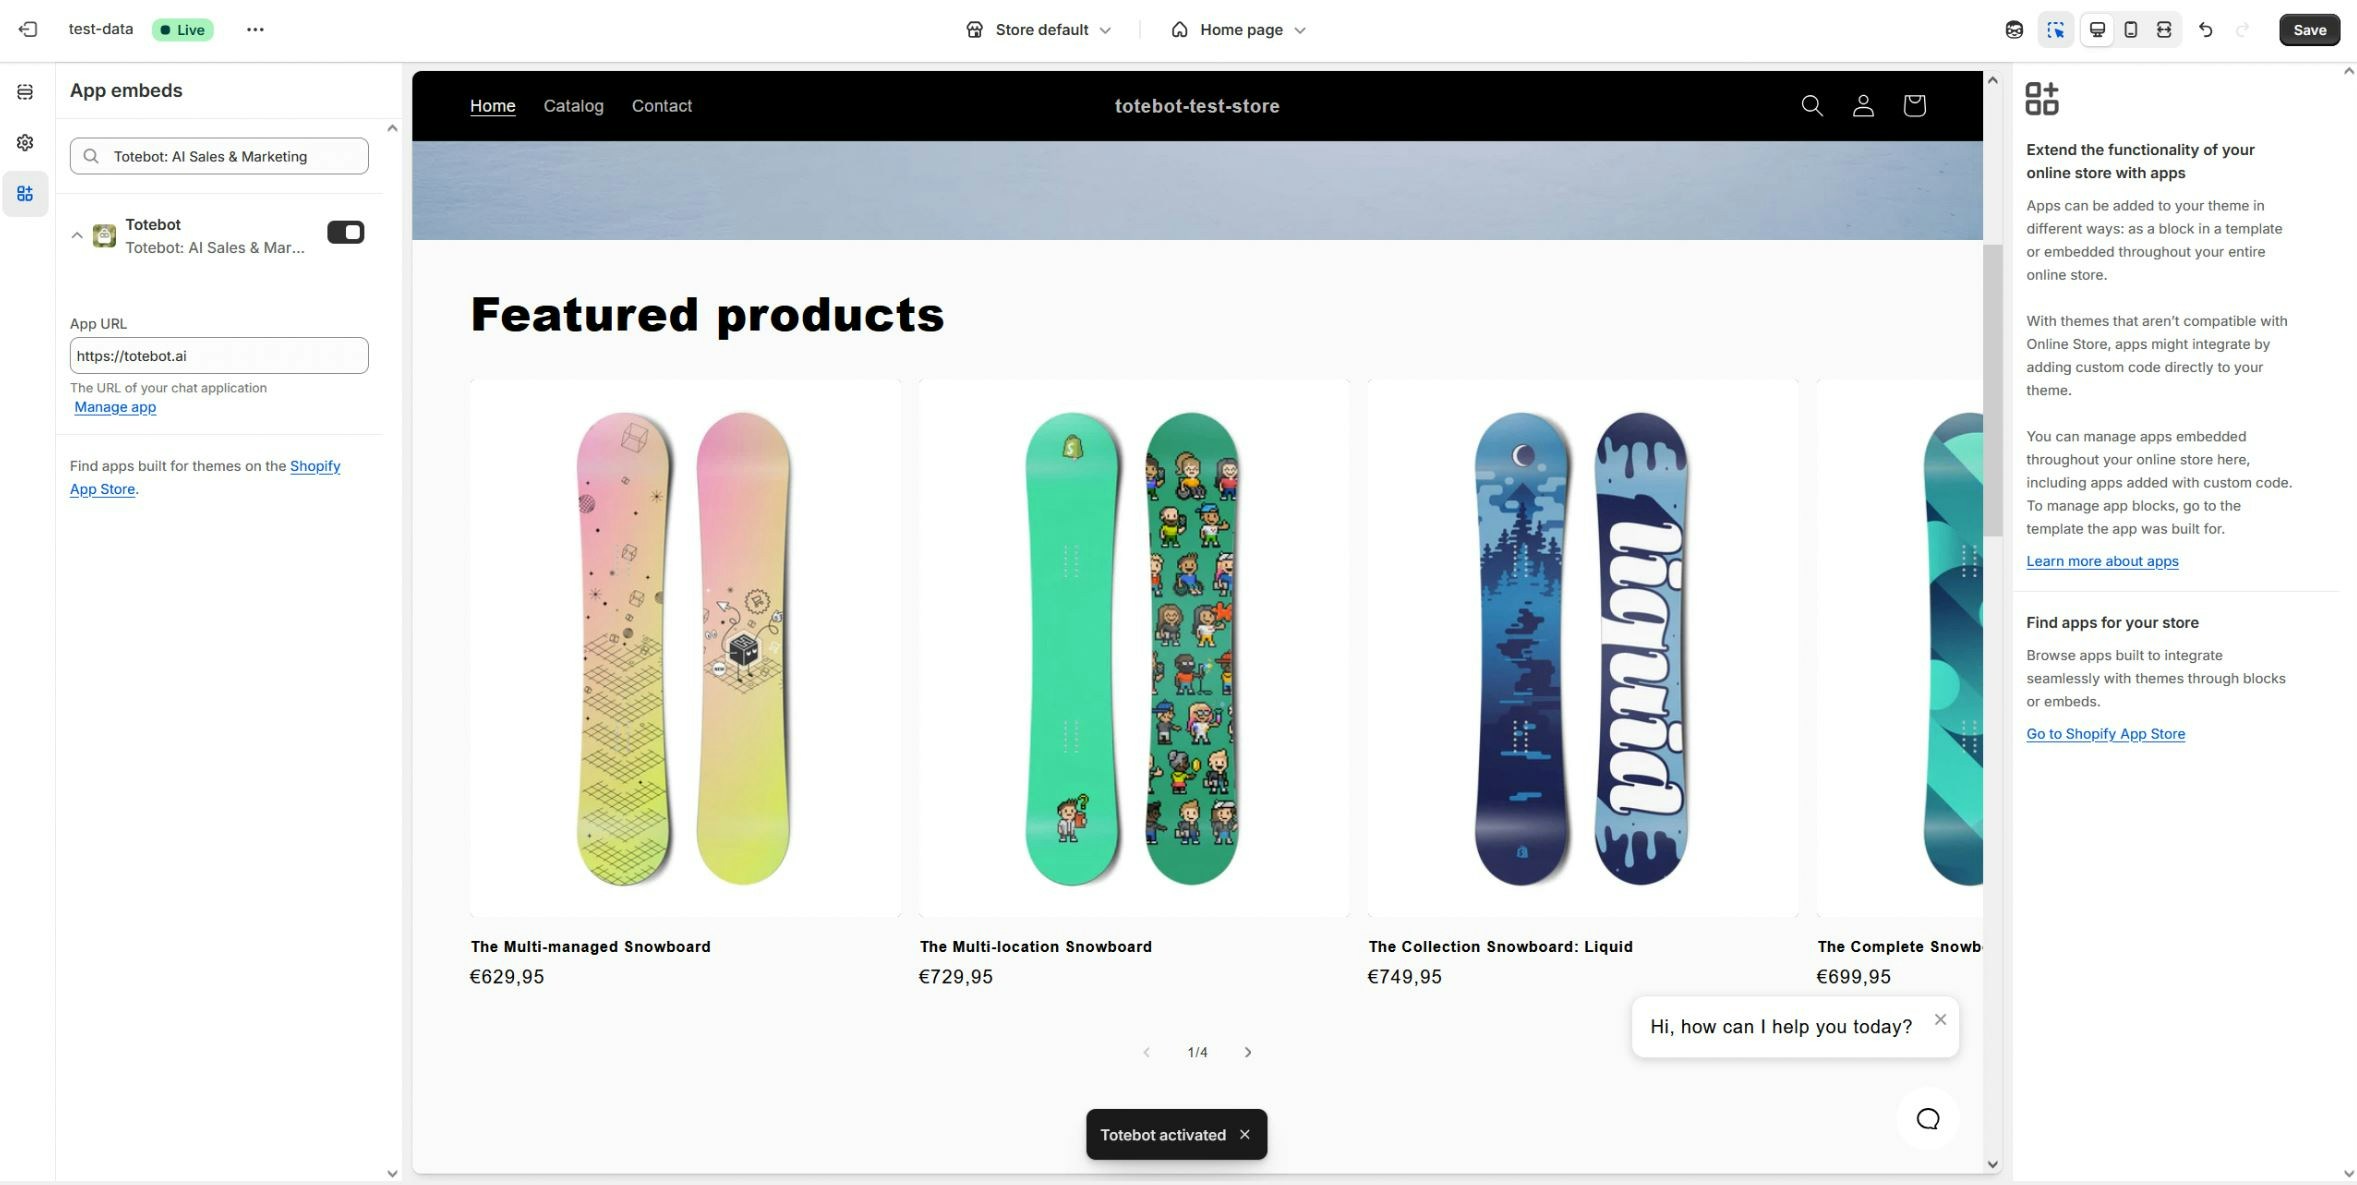
 Follow the provided link to open your Shopify store. You'll see a confirmation that Totebot is active, along with an indicator in the upper-left corner, and the chat widget displayed and ready to use.
 ## Step 3: Customize Your Agent
Start customizing by going to **Settings**, then selecting **Chat Interface**. In this section, we'll cover only the basic customization options.
### General Settings
Add an agent name and profile image
Customize bubble color, text color, and more, with a live preview on the right
Choose when and how the chat bubble appears
See changes in real-time as you customize
## Step 3: Customize Your Agent
Start customizing by going to **Settings**, then selecting **Chat Interface**. In this section, we'll cover only the basic customization options.
### General Settings
Add an agent name and profile image
Customize bubble color, text color, and more, with a live preview on the right
Choose when and how the chat bubble appears
See changes in real-time as you customize
 ### Content Settings
* **Welcome Message**: Write your welcome message
* **Timing**: Choose how soon it should appear after a visitor lands on your site
* **Suggestions**: Add quick-start options to guide user conversations
### Content Settings
* **Welcome Message**: Write your welcome message
* **Timing**: Choose how soon it should appear after a visitor lands on your site
* **Suggestions**: Add quick-start options to guide user conversations
 Explore additional options for further fine-tuning. Click **Save** to apply changes.
## Step 4: Knowledge
Your AI agent learns from the information you provide in the Knowledge section.
In the left sidebar, click **Knowledge** and prepare the content for upload.
PDFs, product catalogs, or user manuals
Add and format content directly
Add URLs to your store pages, blog posts, policies, etc.
Include commonly asked questions with clear answers
Once you've added content, click **Train agent** to update your AI agent with the new knowledge.
You can keep adding and updating your knowledge base over time. The more relevant info you include, the smarter and more helpful your Totebot becomes.
## You're Ready
With these four steps, your first Totebot is up and running.
## Peak Performance Tips
Setting up Totebot is straightforward, but fine-tuning your Knowledge Base will make a huge difference in the quality of answers and customer experience. Here are some useful suggestions:
Upload PDFs or other files that are clear, structured, and complete. Include product details, FAQs, policies, and guides. The better your documents are, the more precise the agent's replies will be.
Insert links to your website, blog, or policy pages. Make sure they point to accurate, up-to-date content, and remove any outdated or broken links so your agent doesn't serve old information.
If customers often ask questions not covered by your documents or links, add them manually as specific Q\&A pairs. This ensures the agent always has an exact, brand-approved answer ready.
Check engagement, sentiment, and performance in the analytics dashboard. This shows how well your agent is performing and where it may need improvement.
Go through past conversations to see if customers are getting the right answers. Use the **Revise Answer** option to improve replies and help your agent learn over time.
Pay attention to how your agent contributes to sales, such as add-to-cart events, initiated checkouts, or generated leads. This helps you see the real business impact.
## Next Steps
Automate tasks like sending emails and generating leads
Connect Totebot to channels, stores, and tracking platforms
Track performance and optimize results
Fine-tune your agent's behavior and appearance
Explore additional options for further fine-tuning. Click **Save** to apply changes.
## Step 4: Knowledge
Your AI agent learns from the information you provide in the Knowledge section.
In the left sidebar, click **Knowledge** and prepare the content for upload.
PDFs, product catalogs, or user manuals
Add and format content directly
Add URLs to your store pages, blog posts, policies, etc.
Include commonly asked questions with clear answers
Once you've added content, click **Train agent** to update your AI agent with the new knowledge.
You can keep adding and updating your knowledge base over time. The more relevant info you include, the smarter and more helpful your Totebot becomes.
## You're Ready
With these four steps, your first Totebot is up and running.
## Peak Performance Tips
Setting up Totebot is straightforward, but fine-tuning your Knowledge Base will make a huge difference in the quality of answers and customer experience. Here are some useful suggestions:
Upload PDFs or other files that are clear, structured, and complete. Include product details, FAQs, policies, and guides. The better your documents are, the more precise the agent's replies will be.
Insert links to your website, blog, or policy pages. Make sure they point to accurate, up-to-date content, and remove any outdated or broken links so your agent doesn't serve old information.
If customers often ask questions not covered by your documents or links, add them manually as specific Q\&A pairs. This ensures the agent always has an exact, brand-approved answer ready.
Check engagement, sentiment, and performance in the analytics dashboard. This shows how well your agent is performing and where it may need improvement.
Go through past conversations to see if customers are getting the right answers. Use the **Revise Answer** option to improve replies and help your agent learn over time.
Pay attention to how your agent contributes to sales, such as add-to-cart events, initiated checkouts, or generated leads. This helps you see the real business impact.
## Next Steps
Automate tasks like sending emails and generating leads
Connect Totebot to channels, stores, and tracking platforms
Track performance and optimize results
Fine-tune your agent's behavior and appearance